Jenkins is an open-source automation server that facilitates the continuous integration and continuous delivery (CI/CD) of software projects. It provides a platform for automating various tasks such as building, testing, and deploying applications, allowing development teams to streamline their development processes and improve overall efficiency.
Companies use Jenkins not just for software delivery but also for managing infrastructure as code (IaC) and executing configuration management tasks across diverse environments.
Prerequisites
-> Jenkins can be installed on various operating systems, such as Linux, macOS, and Windows. Before proceeding, ensure that your system meets the necessary requirements for running Jenkins. In this guide, we focus on Linux, specifically Ubuntu.
-> Jenkins requires Java to run. Install the appropriate version of the JDK based on Jenkins compatibility. Typically, OpenJDK is recommended for Ubuntu systems.
-> If your system uses a firewall, configure it to allow traffic on the port used by Jenkins (usually port 8080).
Steps to Install Jenkins on Ubuntu
1. Update System Packages
root@ervintest:~# apt update
root@ervintest:~# apt upgrade
2. Install Java Development Kit (JDK)
Jenkins requires Java to run. Install the OpenJDK package using the following command:
root@ervintest:~# apt install openjdk-11-jdkVerify the installation by checking the Java version:
root@ervintest:~# java -version
3. Install Jenkins
root@ervintest:~# apt-get install jenkins -y 4. Start and Enable Jenkins Service
root@ervintest:~# systemctl start jenkins
root@ervintest:~# systemctl enable jenkins
Check the status of the Jenkins service to ensure it’s running:
root@ervintest:~# systemctl status jenkins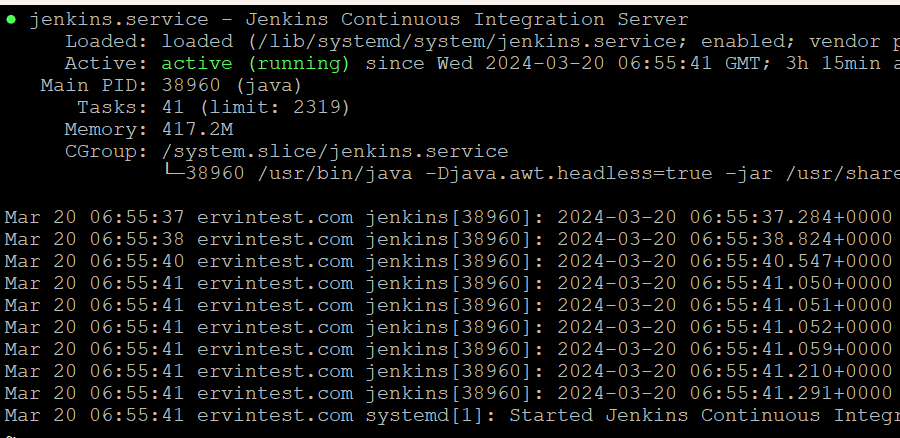
5: Configure Firewall
If a firewall is enabled on your system, allow traffic on port 8080, which is used by Jenkins:
root@ervintest:~# ufw allow 8080Access Jenkins Web Interface
- Retrieve the initial administrator password by running the below command in terminal:
root@ervintest:~# cat /var/lib/jenkins/secrets/initialAdminPasswordCopy the generated password .
2. Then open a web browser and navigate to http://your_server_ip_or_domain:8080. You should see the Jenkins initial setup page.
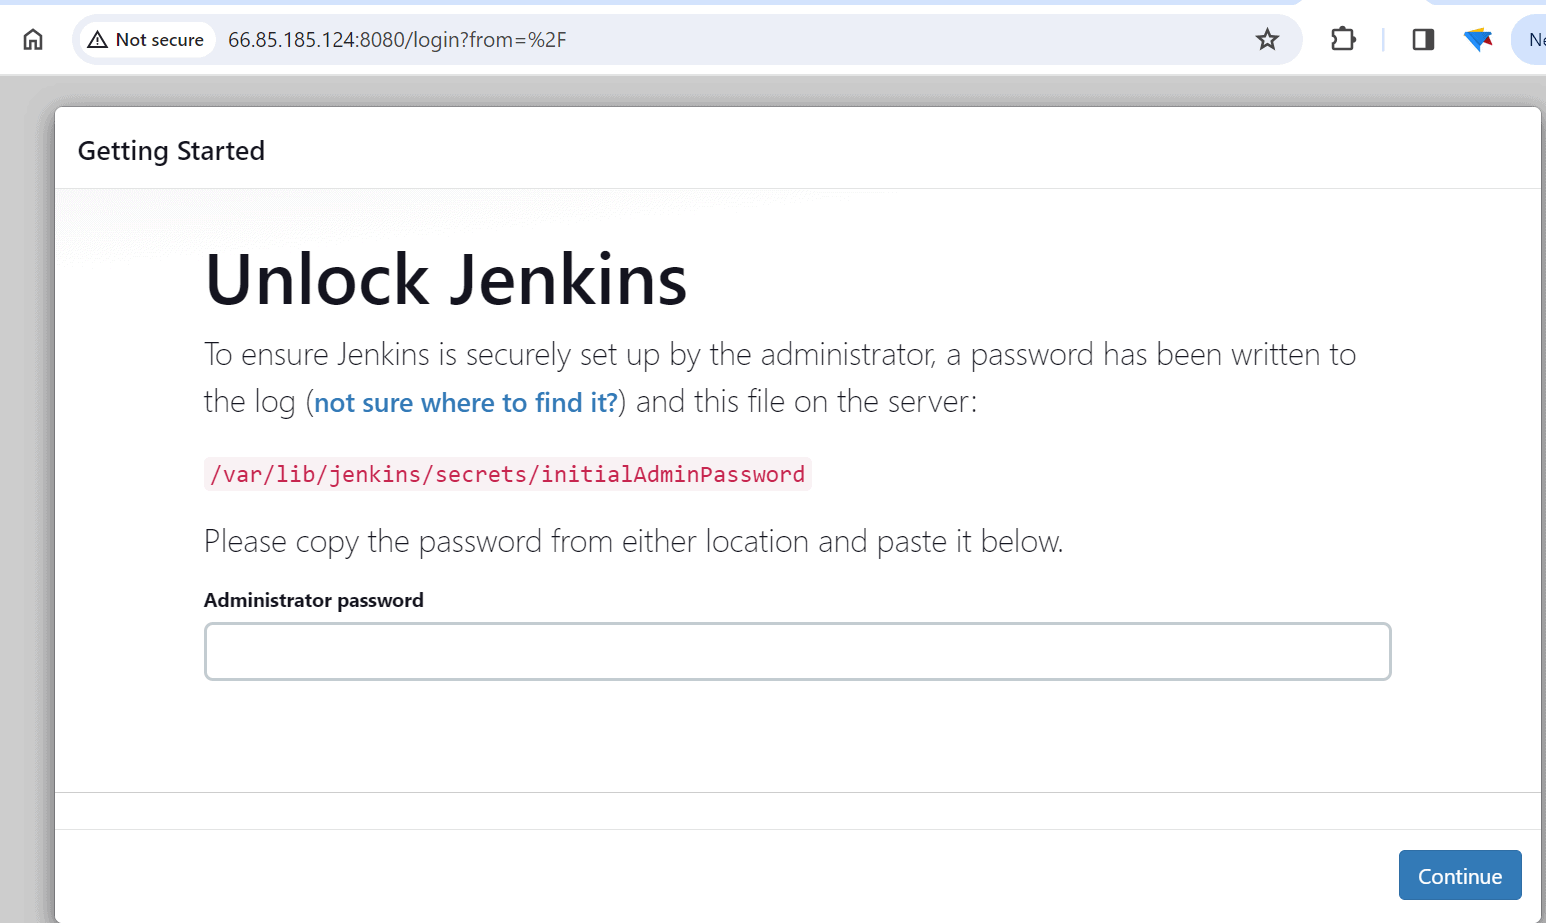
Paste the generated password and continue.
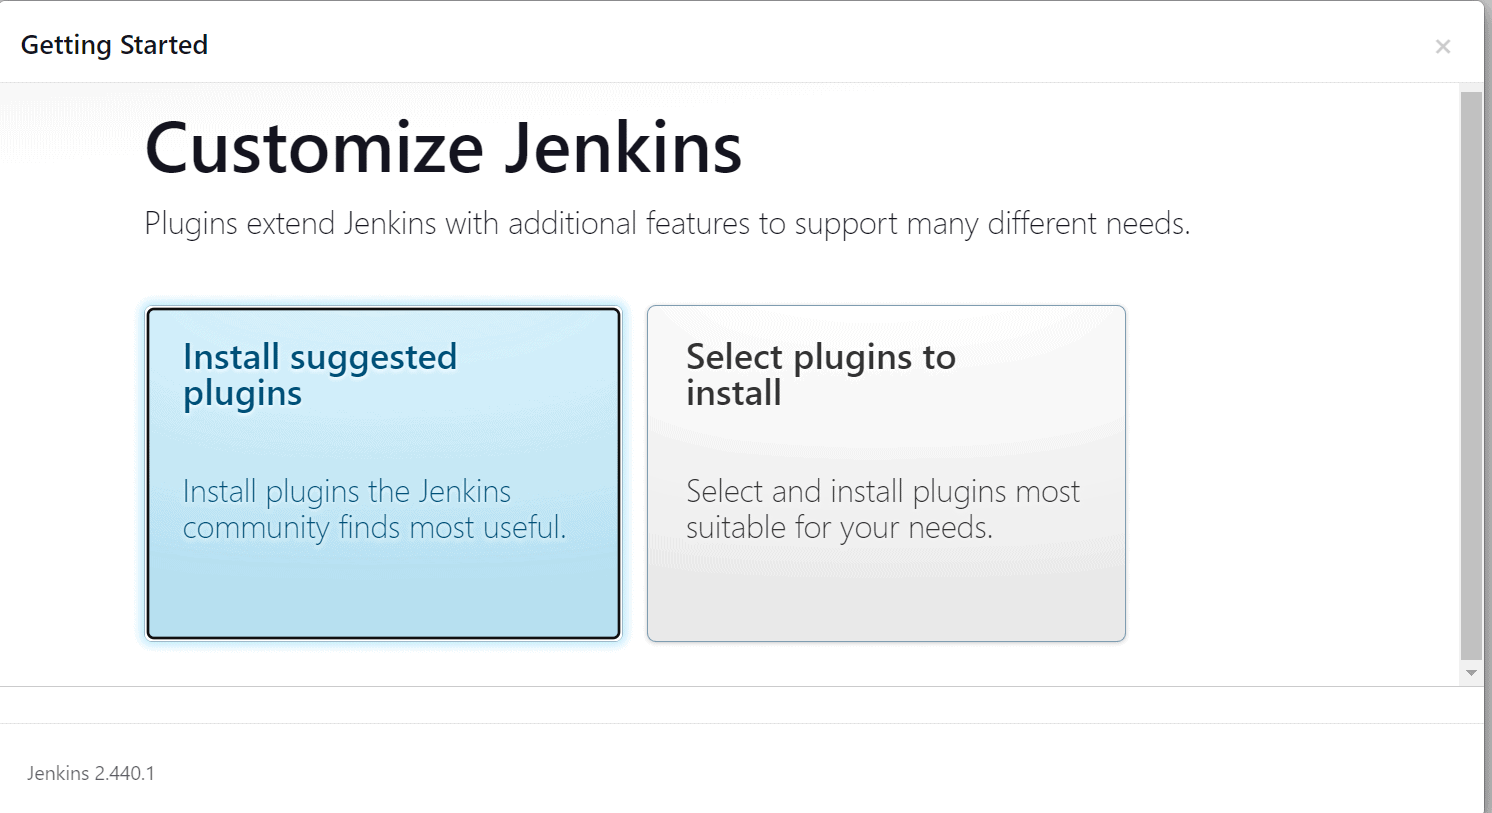
Install Plugins for Jenkins
Follow the on-screen instructions to complete the Jenkins setup wizard. You can choose to install recommended plugins or select specific plugins based on your requirements.
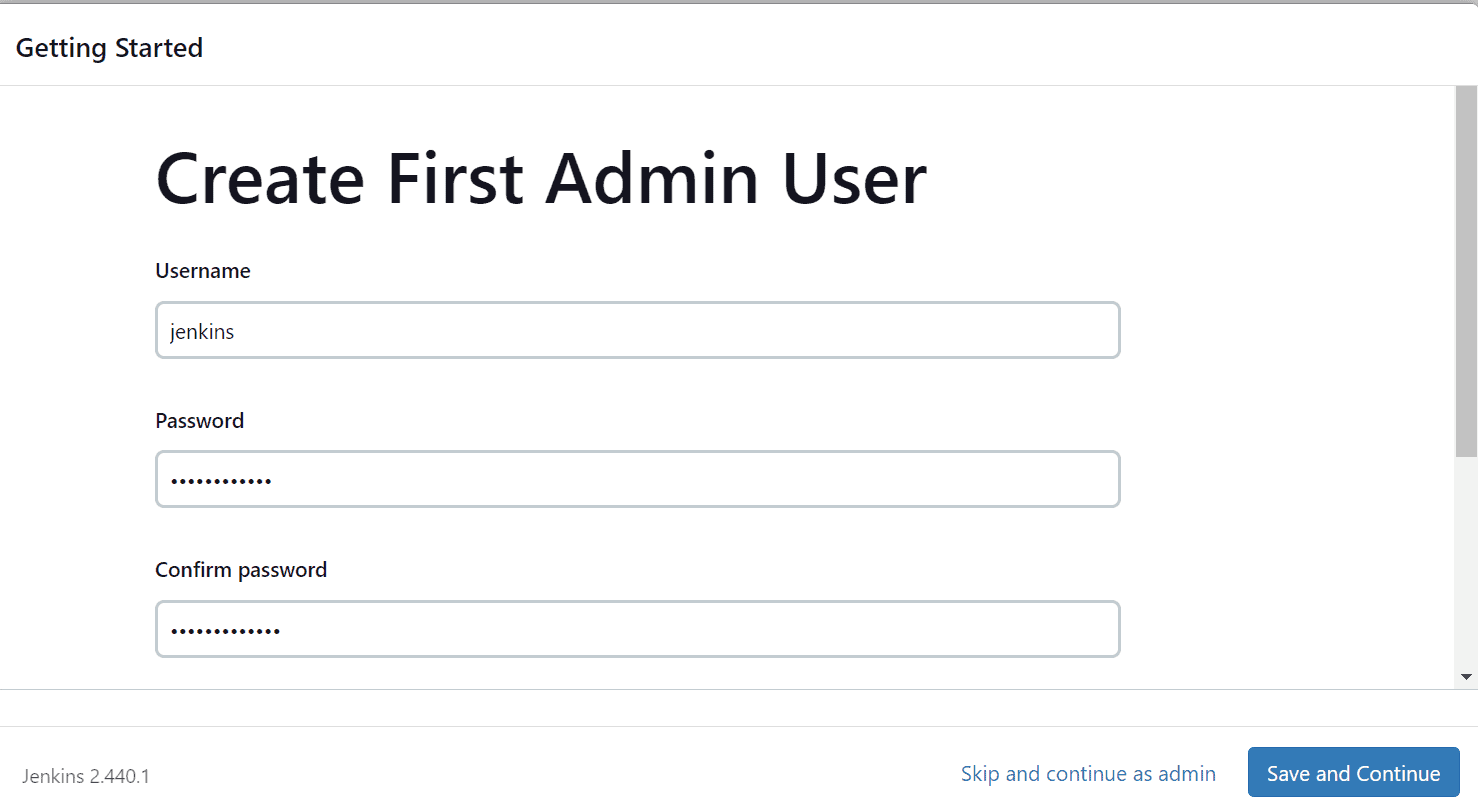
Create Admin User
After plugin installation, create an admin user by providing the required details such as username, password, full name, and email address.
Additional Configurations on Jenkins
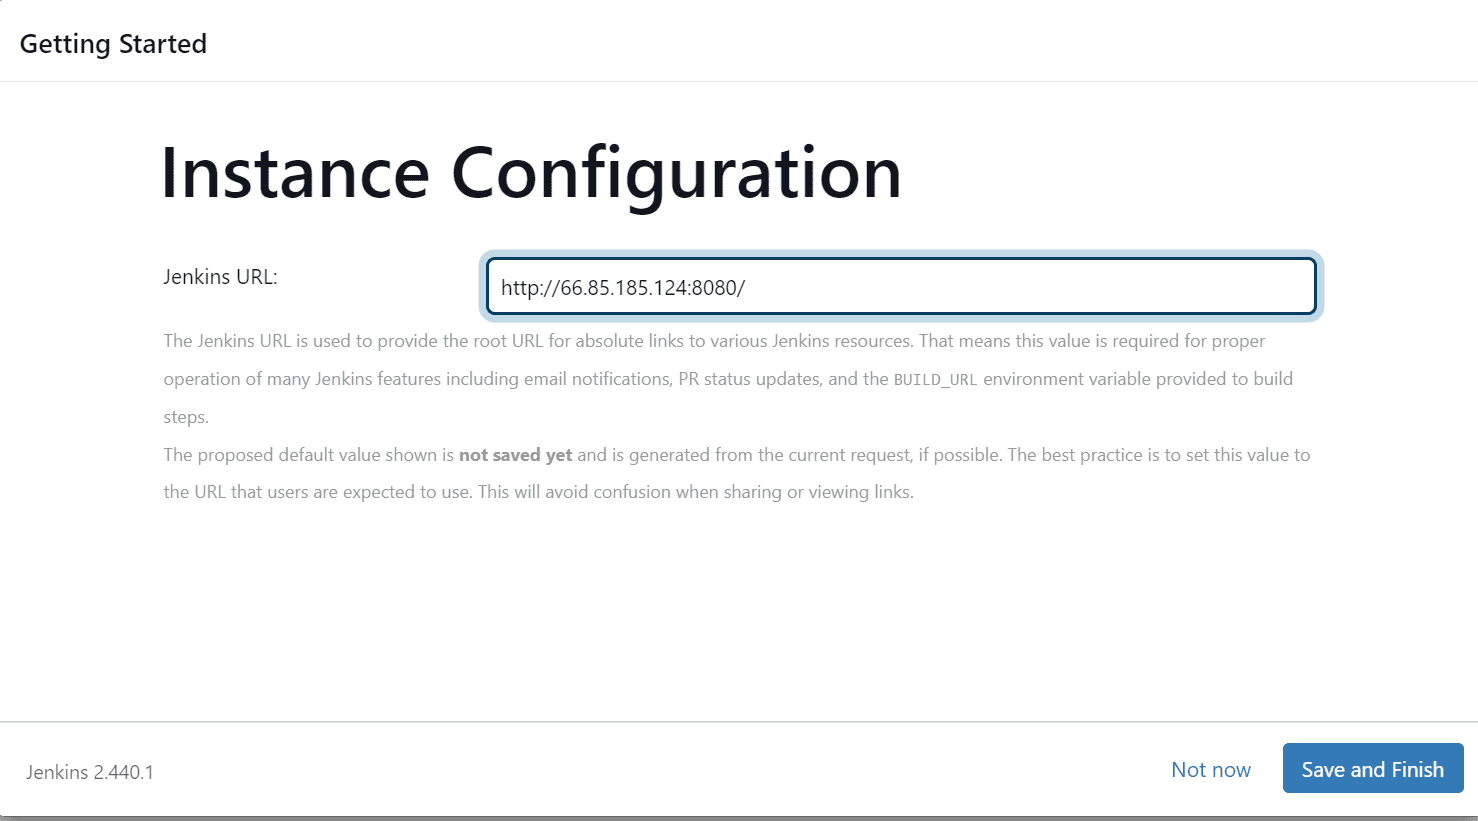
1. Instance Configuration
Once the user setup is completed, you will prompt to instance configuration. If you want to change the default Jenkins URL (http://localhost:8080), you can do it here.
2. Configure sudo privillege
In Jenkins, the default user ‘jenkins’ is created in the installation process and is primarily used to run Jenkins services and processes in the background. This user is typically a non-root user and is managed at the operating system level.
However, users created within the Jenkins console are different and are meant for managing Jenkins through the web browser interface. These users are used for authentication, access control, and managing Jenkins jobs, pipelines, and configurations. They do not have direct access to operating system-level tasks or permissions.
When the ‘jenkins’ user (or any other non-root user) doesn’t have sufficient privileges at the operating system level, it cannot perform administrative-level tasks directly. To gain administrative-level access, you need to configure sudo (Superuser Do) to allow ‘jenkins’, to execute commands with elevated privileges.
By configuring sudo, you can grant certain users the ability to run commands as the superuser (root) or other privileged users without requiring them to log in as root.
visudoAdd the following line at the sudoers file to allow the user ‘jenkins’ to use sudo without a password prompt
jenkins ALL=(ALL) NOPASSWD: ALL
After making these changes, the ‘jenkins’ user will have administrative-level access through sudo without needing a password prompt
systemctl restart jenkinsTo know more about sudo user, Kindly refer https://www.veeble.org/kb/disabling-root-login-and-creating-a-sudo-user-for-strengthening-vps-security/
Once these steps are completed, you can start using Jenkins to create and manage your build, test, and deployment pipelines.