As a hosting provider, we encountered a range of critical issues while hosting websites on our shared server. These issues included outdated Content Management Systems, blacklisted domains, bad bot activity, malicious requests, brute force attacks, and malicious file uploads. These challenges are common in the web hosting industry, and they posed significant threats both at the server level and to end users.
In our quest to address these challenges effectively, we implemented Immunify360, a comprehensive security solution designed specifically to combat the above issues in hosting environments. Immunify360 became an integral part of our server infrastructure, delivering a range of critical security features to our server and our clients’ websites.
Below, I have outlined the fundamental steps for integrating Immunify360 into a cPanel shared server environment. It’s important to note that while we’ve customized security rules to increase the protection of websites hosted on our server, these specific customizations are not covered in this context. The focus here is on providing installation steps and general configurable options.
- Visit the official Immunify 360 website or contact a reseller to purchase a license, Once you’ve obtained the license key, keep it handy for installation.
2. Log in to Your cPanel Server
Run the following command to install Immunify 360
#wget https://repo.imunify360.cloudlinux.com/defence360/i360deploy.sh -O
#bash i360deploy.sh –key YOUR_KEY
The script will download and install Immunify 360 on your server.
If you have an IP-based license, run the same script with no arguments:
#bash i360deploy.sh
After installation, you will be prompted to enter your Immunify 360 license key.
Enter your license key when prompted and follow the on-screen instructions.
Once Immunify 360 is installed and licensed, you can access it through the WHM interface in cPanel
In WHM, search for “Immunify360” in the search bar, or you may find it under the “Plugins” section.
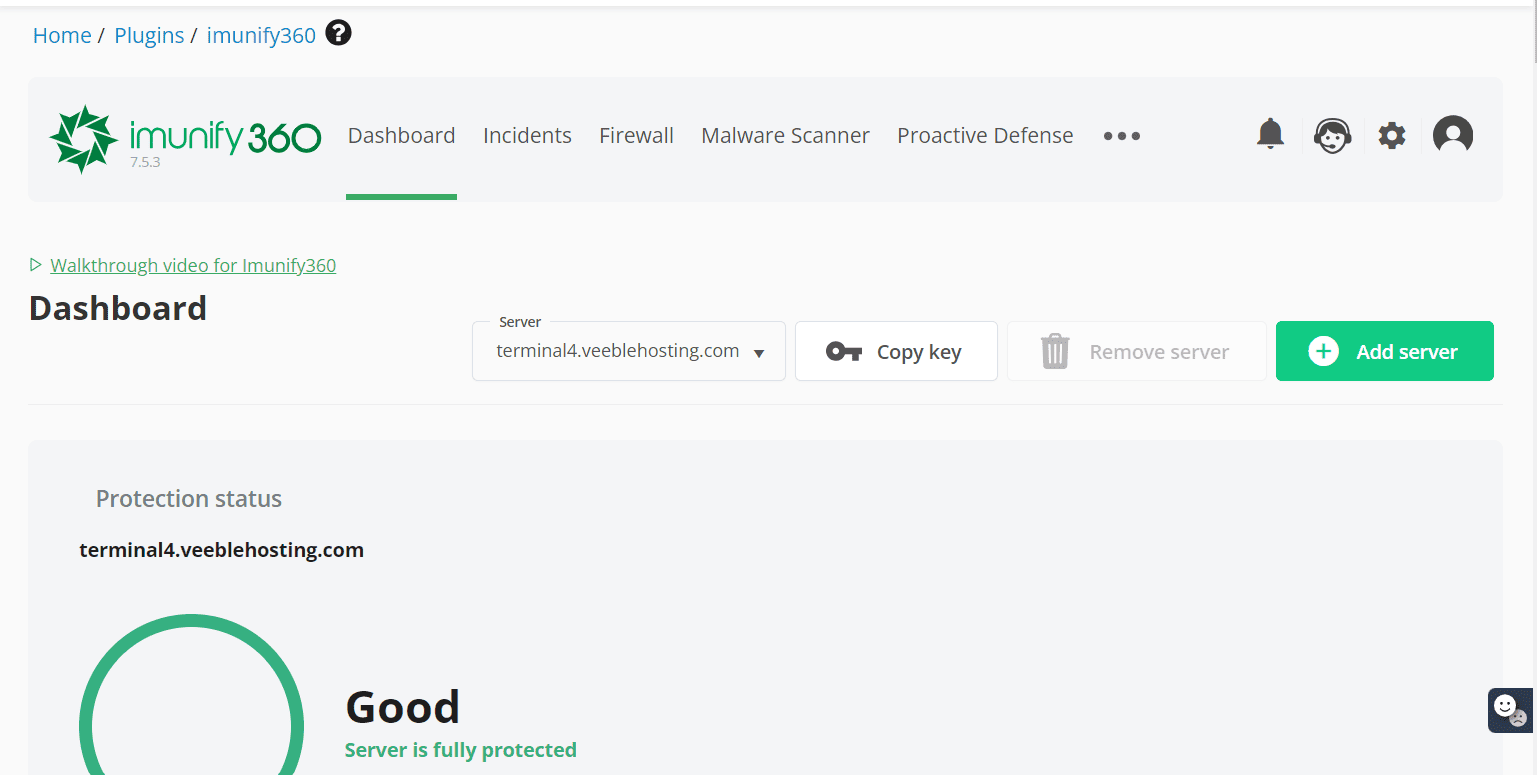
This is the admin dashboard you get when you launch the immunify admin panel from WHM
The dashboard will show the overall protection status of the server and graphical representation of historical incidents and alerts.
Incidents
The incidents tab shows a comprehensive record of identified incidents and detailed information regarding the causes of these incidents and manageable options for that particular incident.

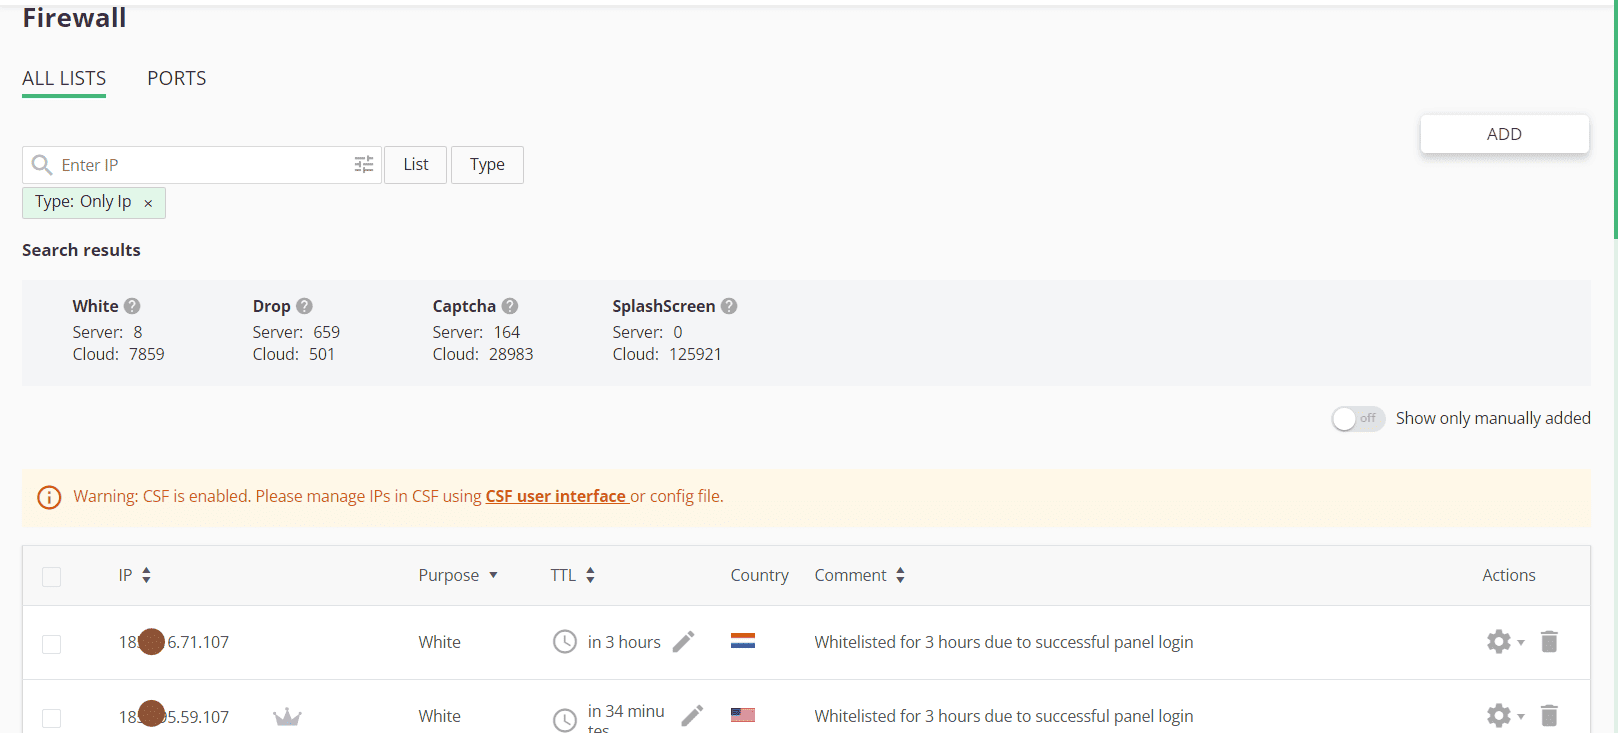
Firewall
This section enables the management of blacklists and whitelists for IP addresses. Additionally, it offers integrated server port management, When CSF integration is enabled, the feature for managing blocked ports will be deactivated. Imunify360 automatically imports information about closed ports and their associated whitelisted IP addresses from CSF.
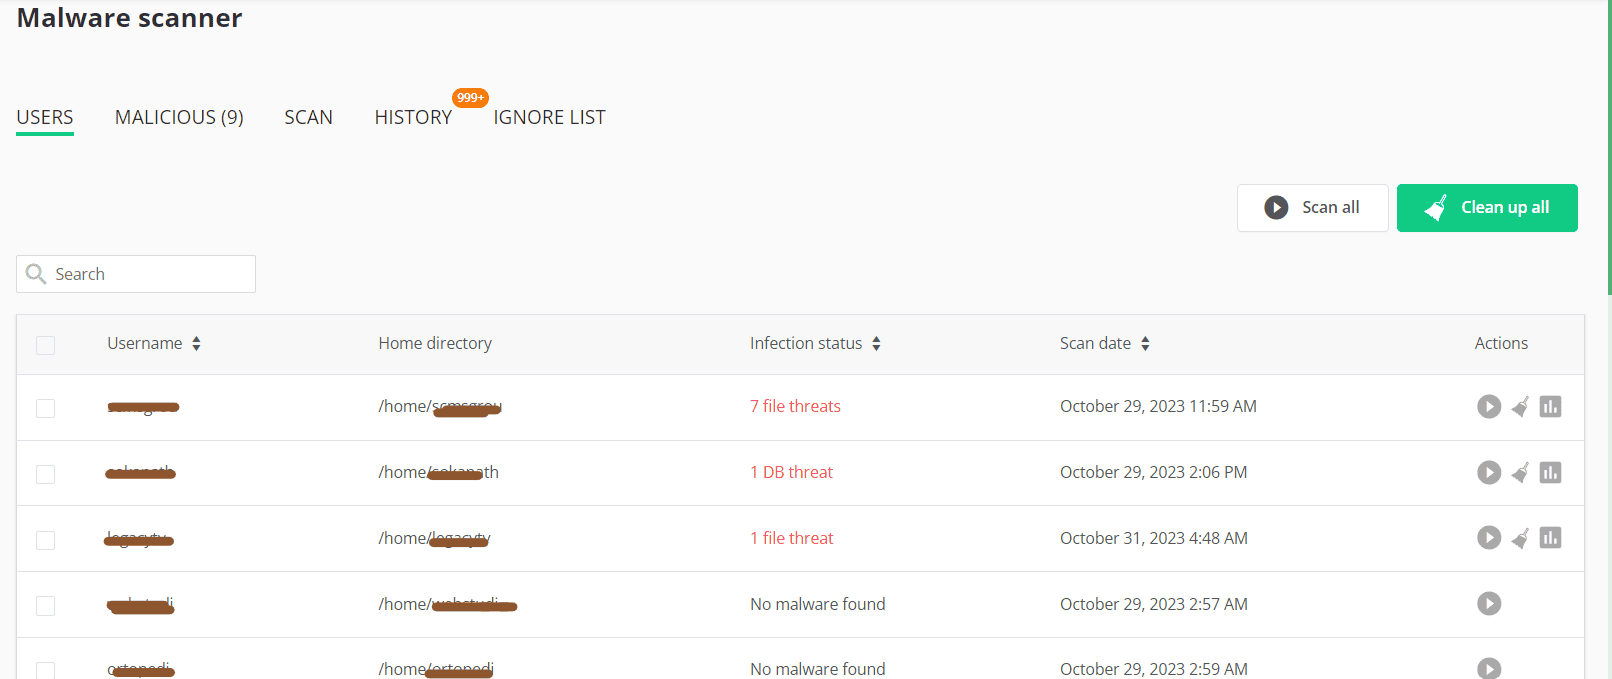
Malware scanner
Imunify360’s Malware Scanner is a powerful tool designed to scan file systems for malware injections and effectively clean up any infected files it detects. This feature operates in real-time, continuously monitoring for vulnerabilities and providing comprehensive protection. It offers the flexibility to scan files uploaded through various means, including FTP (with support for Pure-FTPd) and HTTP/HTTPS. Additionally, you can initiate on-demand scans for specific folders as needed.
Proactive Defense
This feature is designed to proactively block malicious activities coming from PHP scripts. It is available as a PHP module for Apache and LiteSpeed web servers and analyzes script activity for known patterns such as obfuscated command injection, malicious code placement, spam transmission, SQL injection, and more to safeguard your web environment from potential threats.
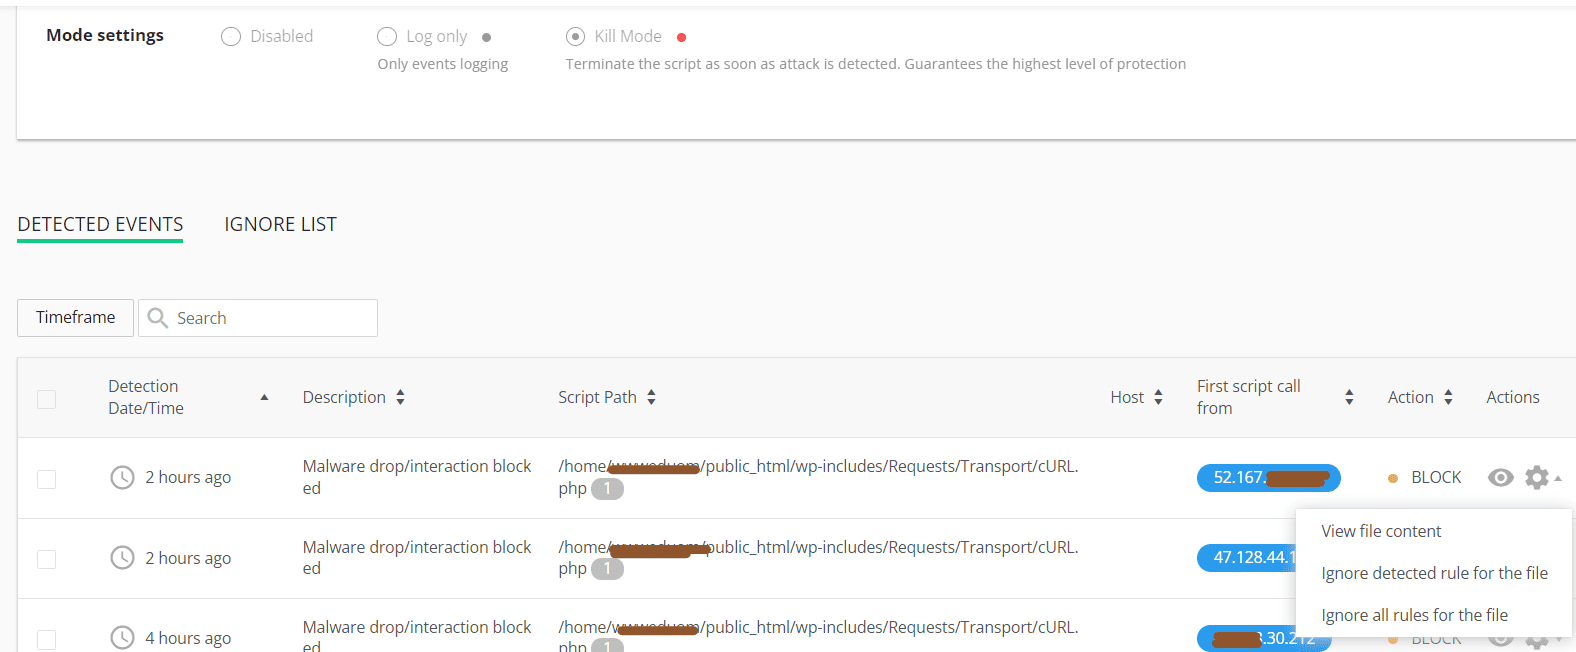
The Detected Events table displays all the necessary information about PHP scripts with malicious activity detected by Imunify360 Proactive Defense, and we can take action for the detected events.
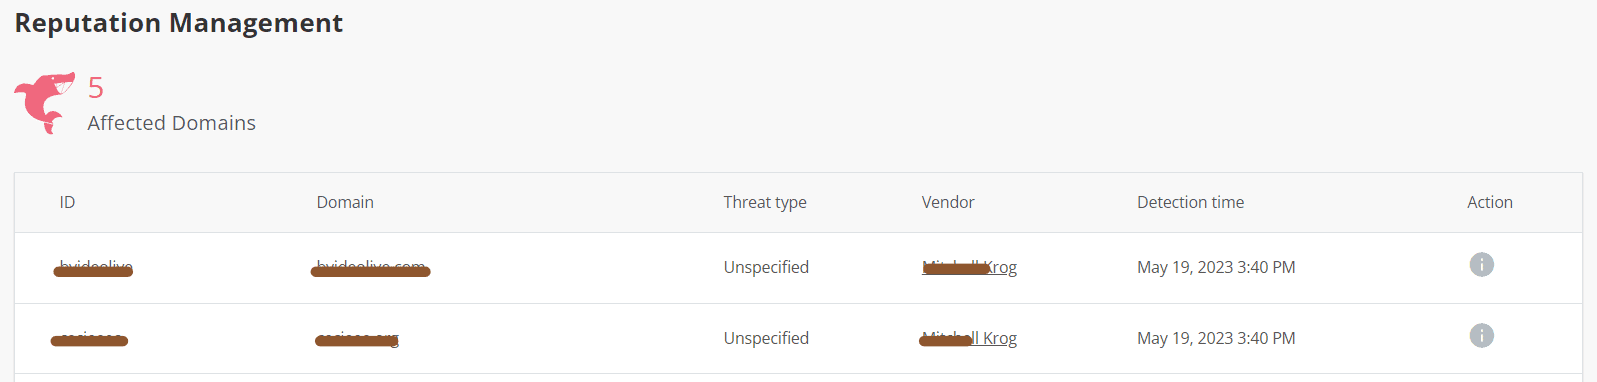
Reputation management and Kernal care
Reputation Management cehcks the reputation of domains hosted on the server by leveraging various reputation engines like Google Safe Browsing, Spamhaus and PhishTank etc.
I
f any of the domain is affected, it will be available in the table
Imunify360 has KernelCare KernelCare integration feature, you will have to install it first from the settings tab.
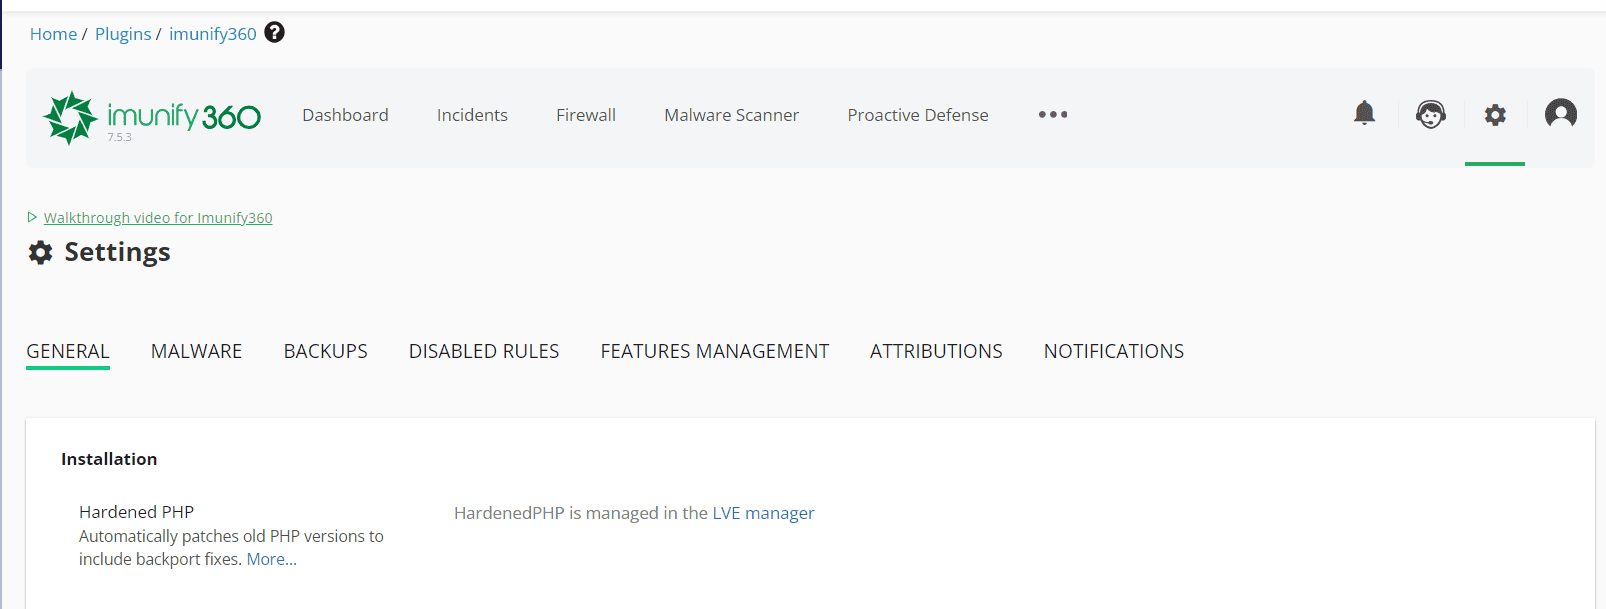
Settings
To access Imunify360’s settings, navigate to the “Settings” option in the main menu. Within the Imunify360 settings page, you’ll find several tabs, each dedicated to specific configurations and options. These tabs include
“General,” where you can configure general settings for your Imunify360 installation.
This is again organized into various sub-sections, each serving a specific purpose.
In the “Installation” section, you can install HardenedPHP, Invisible Captcha, and KernelCare
The “WAF Settings” section allows you to configure ModSecurity, a web application firewall that helps protect your web applications by filtering and blocking malicious web traffic.
For “DoS Protection,” you can set up policies to mitigate Denial of Service attacks and enhance server security.
The “SMTP Traffic Manager” enables you to manage email traffic and ensure its security and reliability.
“3rd Party Integration” is where you can integrate Imunify 360 with other security software or services for enhanced protection.
The “Auto White List” feature helps you maintain a list of trusted IP addresses, ensuring they are not inadvertently blocked by the firewall.
“Incidents Logging” is where you can manage and configure log options.
“WebShield” offers features related to website protection.
“Anti-bot protection” helps prevent malicious bot activity that can harm your server and websites.
The “OSSEC” section is dedicated to configuring OSSEC, a popular host-based intrusion detection system.
“PAM” settings allow you to configure Pluggable Authentication Module settings for user authentication.
“Error Reporting” options help you customize error reporting and handling.
Lastly, in “Contact Details,” you can provide your administrative contact information for notifications and account recovery.
“Malware” allows you to manage malware-related settings, while “Backups” is for configuring your backup preferences. In the “Disables Rules” tab, you can customize rules for blocking or allowing certain activities. “Attributions” provides information and credits, and “Notifications” enables you to tailor your notification preferences to stay informed about critical events. These tabs offer a comprehensive array of options to fine-tune your Imunify360 installation according to your specific needs and security requirements.
There are many security features that are configurable under this software, I have highlighted important settings and configurations only, you can refer to the following article by Immunify to get a detailed idea.
https://docs.imunify360.com/dashboard/#dashboard
By implementing Immunify360, we significantly improved the security and performance of our shared server. We could protect websites from various threats, ensuring that our users’ data remained safe and their online experiences were reliable. Immunify360 became an invaluable tool for managing and securing our shared hosting environment, ultimately resolving the issues we previously faced.