
In the ever-evolving landscape of cybersecurity, we face a constant challenge to fortify systems against potential threats. One pivotal aspect of this defense is the implementation of Two-Factor Authentication (2FA) for OpenSSH, an essential tool for securing remote access to servers. In this article, I will share my journey of setting up Google 2FA for OpenSSH, detailing the steps and considerations involved. By incorporating this additional layer of authentication, we can significantly enhance the security posture of our server infrastructure.
1. Install the Google authenticator
The very first step is installing the Google Authenticator on the server. For this install the ‘libpam-google-authenticator’ package to enable the Google Authenticator PAM module.
root@ervintest:~# apt-get install openssh-server libpam-google-authenticator2: Configure OpenSSH
Edit the SSH daemon configuration file to enable PAM authentication. Open the ‘/etc/ssh/sshd_config’ file with your preferred text editor.
root@ervintest:~# vi /etc/ssh/sshd_configEnsure the following lines are uncommented:
ChallengeResponseAuthentication yesSave and close the file, then restart the SSH service:
root@ervintest:~# service ssh restart3: Configure Google Authenticator
Run the following command to configure the Google Authenticator for your user account:
root@ervintest:~# google-authenticatorFollow the on-screen instructions to set up 2FA. This process includes scanning a QR code with the Google Authenticator app on your mobile device.
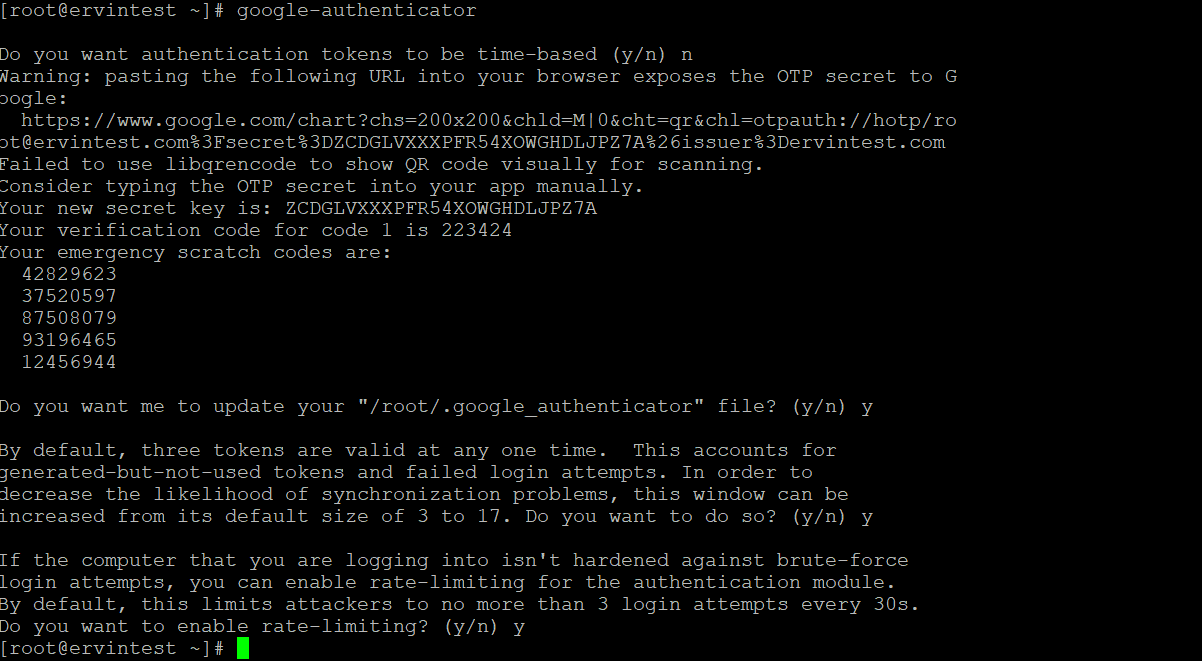
You will see a secret key and numerous “emergency scratch codes” when you use Google Authenticator. If your secret key is lost, you can only use emergency codes once, so make sure you write them down and save them somewhere safe.
4: Adjust PAM Configuration
Edit the ‘/etc/pam.d/sshd’ file to include Google Authenticator. Open the file with your text editor:
root@ervintest:~# vi /etc/pam.d/sshdAdd the following line at the top:
auth required pam_google_authenticator.soSave and close the file.
5: Restart SSH Service
Restart the SSH service once again to apply the changes:
root@ervintest:~# service ssh restart6. Using Google Authenticator app
Utilize the Google Authenticator app on your iPhone, Android, or Blackberry device to enter a secret key and generate a verification code. Also to complete it, in the Google Authenticator app, you can scan the bar code found on the url in the above image
7. Testing Two-Factor Authentication
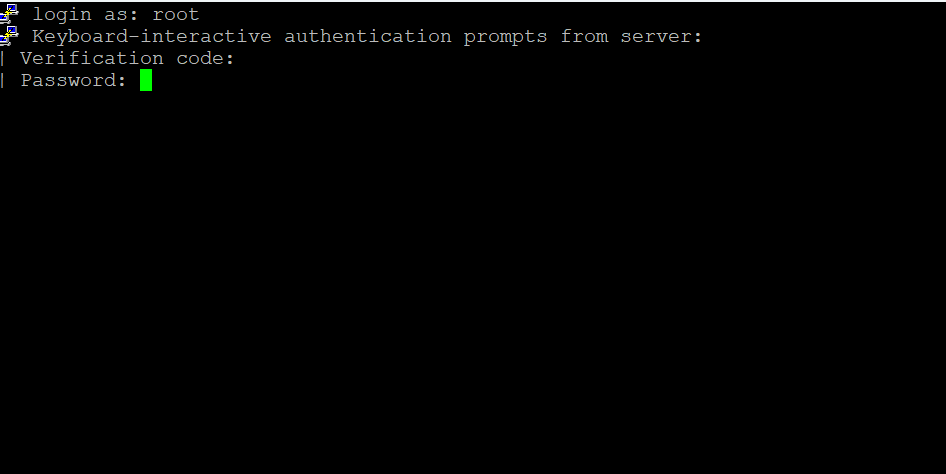
After setting up two-factor authentication for OpenSSH, you can test it by trying to access your server from a remote computer. You will also be asked for a verification token from the Google Authenticator app on your mobile device along with your password.
Congratulations! You have successfully configured Google 2FA for OpenSSH on your server. This additional layer of security significantly enhances the protection of your system, ensuring that only authorized users with both a password and a time-based one-time password (TOTP) from the Google Authenticator app can access the server. Stay secure!