For many Linux users, one common requirement after boosting disk space on a KVM (Kernel-based Virtual Machine) VPS is to expand a partition. This comprehensive manual offers a methodical strategy to effectively utilize the additional disk space in a KVM virtual environment.
Understanding the Context
In a KVM VPS setup, disk space extension might be necessary after a virtual disk upgrade. Sometimes extension of this disk space will be impossible because the swap partition is in between the old root partition and the newly added disk space which may create a barrier for extending the disk due to sector discontinuity. This guide covers the steps to extend the root partition (OS partition) without much risk.
Preparing for Partition Extension
Secure Your Data: Before any partition modification, back up crucial data. This step is vital in a virtual environment to prevent data loss.
Review Current Disk Configuration: Utilize tools like lsblk or fdisk -l within your KVM VPS to understand the current partition structure, guiding your resizing approach.

In the image above, you can see a representation of disk space, including a newly added 10GB of unallocated space. Unfortunately, allocating this space to vda1 is not possible due to the SWAP partition being positioned immediately after the current ROOT partition. This configuration hinders the expansion of the disk into the available unallocated space. Such a scenario is common when attempting to extend the ROOT partition after deploying an operating system on a VPS.
The procedures outlined in this knowledge base are based on the assumption that the disk is designated as /dev/vda. Please replace this reference with the appropriate disk identifier as indicated in the output of the lsblk command.
Proceeding with the Partition Extension
Disable and Remove Swap Partition:
First, disable the swap with swapoff /dev/vda2. Then, using fdisk or another partitioning tool, delete vda2 to clear the pathway for extending vda1.
swapoff /dev/vda2fdisk /dev/vda- Type “d” to delete a partition. Choose the partition associated with SWAP.
- Execute the changes and write them to the disk by executing “w”
Create a SWAP Partition in the Last Sector:
After deleting vda2, it is essential to create a new swap partition that is positioned at the terminal sector of the disk. This strategic placement ensures that unallocated space exists between the newly established SWAP partition and the vda1 (ROOT Partition). This configuration is crucial for maintaining contiguous disk sectors, which becomes instrumental when attempting to extend the /vda1 partition in subsequent steps.
Open the fdisk utility for the specified device:
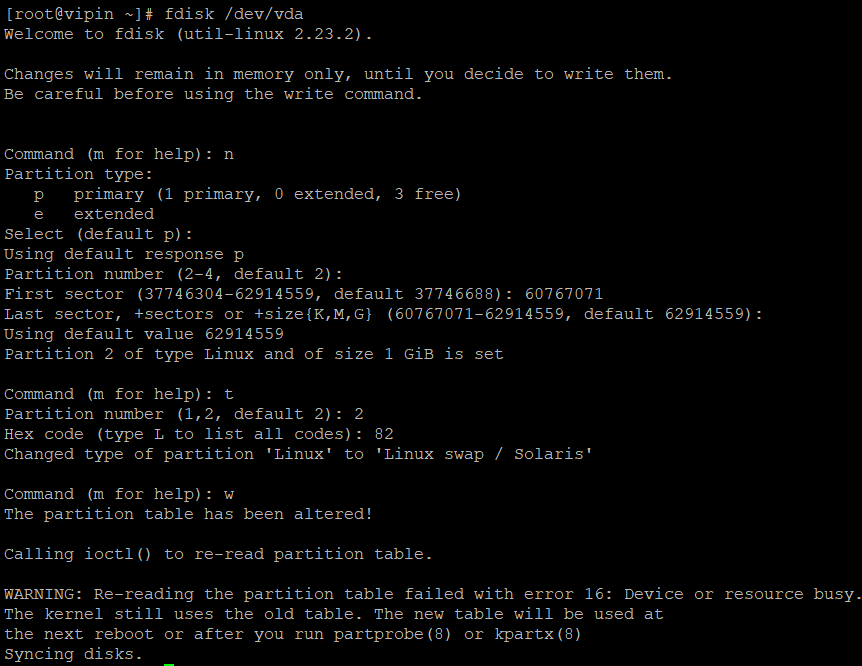
fdisk /dev/vda- Type “n” to create a new partition. Choose the default option, which is usually “Primary.”
- Accept the default partition number suggested by fdisk.
- Set the First sector to a value that is 1GB less than the last sector suggested on the screen. To calculate this, you may need to subtract the size of the partition you want (in this case, 1GB) from the last sector value displayed.
- Set the Last sector to the default value suggested by fdisk.
- Type “t” to change the partition type.
- Enter “82” as the value for the Hex code, as it was the ID of Linux Swap.
- Execute the changes and write them to the disk by executing “w”
Restart the VPS now!
Format and Enable Swap:
Format the new swap space with mkswap /dev/vda2 and then enable it with swapon /dev/vda2.
mkswap /dev/vda2swapon /dev/vda2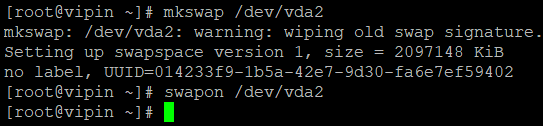
Resize the Filesystem:
Now to extend vda1 , use growpart /dev/vda 1 to grow the file system and then resize2fs /dev/vda1 to resize the filesystem to fill the extended partition.
If the growpart utility is not installed on your VPS, install it with the installation commands:
apt-get update
apt-get install cloud-guest-utils
OR
yum install cloud-utils-growpartFollowed by:
growpart /dev/vda 1If any error occurs during executing the growpart command, reboot the server and try again!
resize2fs /dev/vda1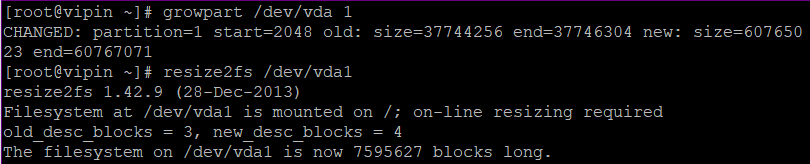
Reboot and Verify:
Reboot your VPS and use lsblk or df -Th to verify that the changes have been applied correctly. Ensure that the swap is active using swapon -s.
df -Th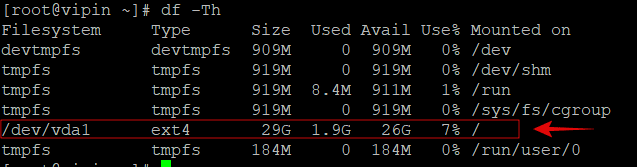
You have now successfully expanded your root disk! Congrats 🎉