
Amazon Elastic Compute Cloud (Amazon EC2) is a web service that provides resizable compute capacity in the cloud. Users can launch virtual servers known as instances and configure them according to their requirements. One of the common ways to connect to an EC2 instance, especially if it runs a Linux-based operating system like Ubuntu or Amazon Linux, is using PuTTY, a popular SSH client for Windows.
Here I provide a step-by-step guide on how to connect to your EC2 instance using PuTTY. By following these instructions, you will be able to establish a secure SSH connection to your EC2 instance and manage it remotely.
Creating an EC2 instance on Amazon Web Services (AWS) involves several steps to configure the instance type, storage, networking, security, and other settings. Here’s a comprehensive guide on how to create an EC2 instance:
Prerequisites
Before proceeding, ensure you have the following prerequisites in place:
- An active AWS account with access to the Amazon EC2 service.
- An EC2 instance launched and running in your AWS account.
- PuTTY installed on your local Windows machine. If you haven’t installed PuTTY yet, download it from the official website: PuTTY Download
How to create an EC2 instance
1: Log in to the AWS Management Console
- Open your web browser and go to the AWS Management Console: AWS Console.
- Log in using your AWS account credentials.
2: Navigate to the EC2 Dashboard
- Once logged in, click on “Services” in the top menu bar.
- Under “Compute,” select “EC2” to access the EC2 Dashboard.
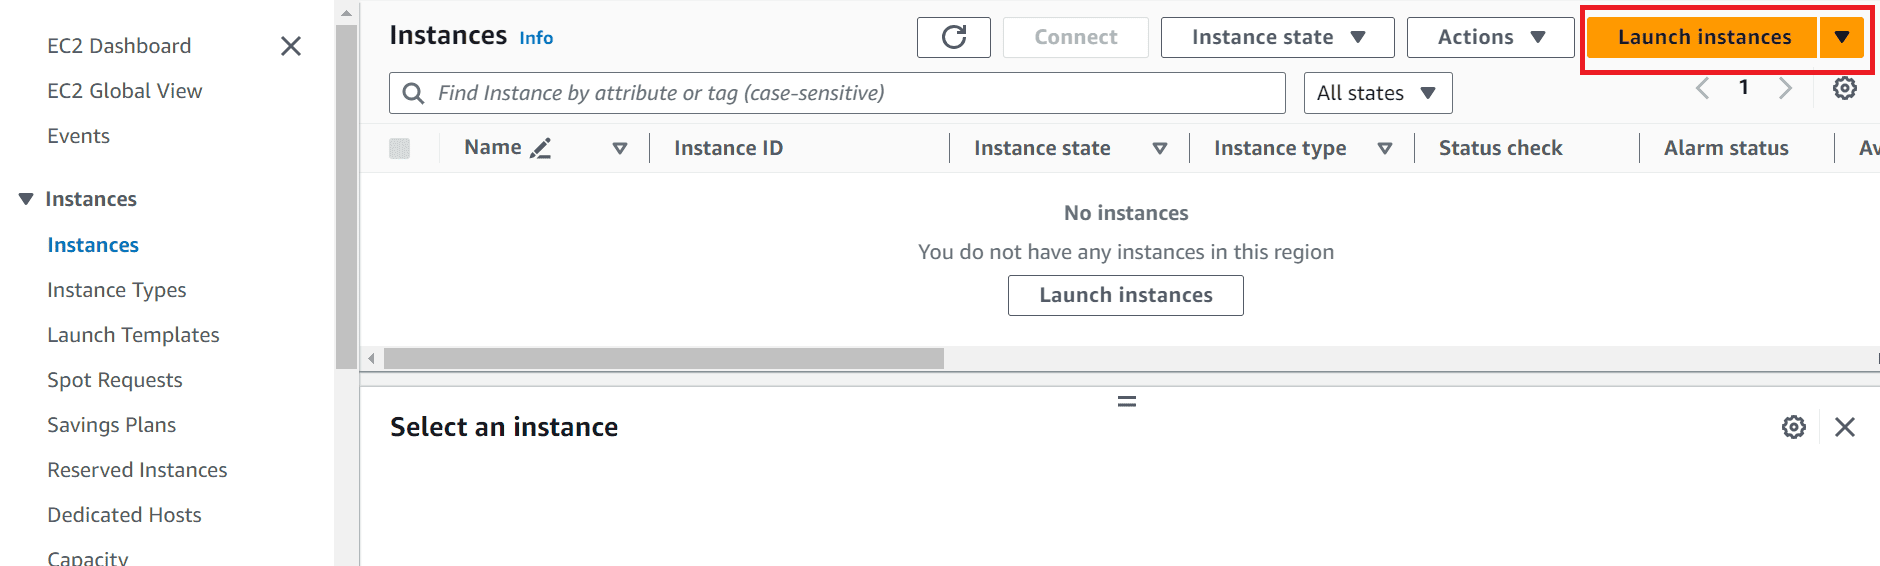
3: Launch Instance
- In the EC2 Dashboard, click on the “Instances” link in the left-hand navigation pane.
- Click the “Launch Instance” button to begin the instance creation process.
4: Choose an Amazon Machine Image (AMI)
- In the “Choose an Amazon Machine Image (AMI)” step:
- Select an AMI based on your requirements (e.g., Amazon Linux 2, Ubuntu Server, Windows Server).
- Click “Select” to proceed.

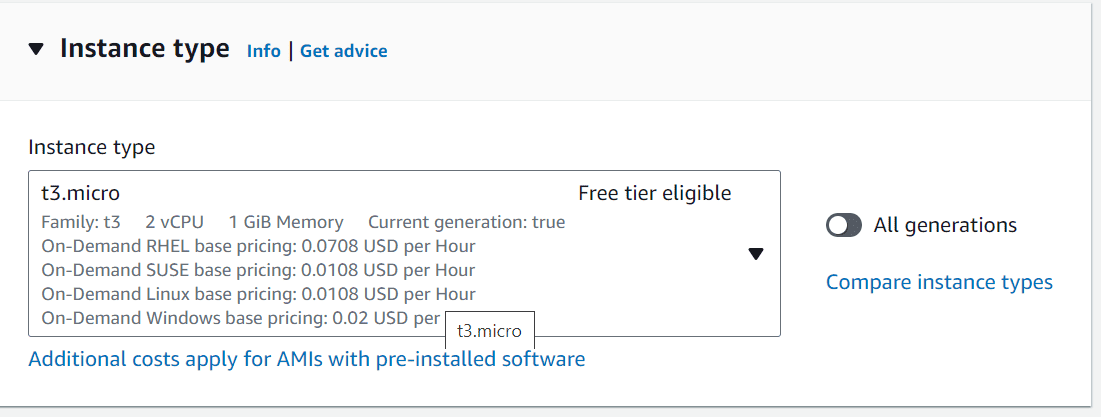
5: Choose an Instance Type
- In the “Choose an Instance Type” step:
- Select the instance type based on your workload and performance needs.
- Click “Next: Configure Instance Details” to continue.
6: Configure Instance Details
- In the “Configure Instance Details” step:
- Configure settings such as the number of instances, VPC, subnet, IAM role (if applicable), etc.
- Customize other options as needed.
- Click “Next: Add Storage” to proceed.
7: Select Key Pair
- In the “Select an existing key pair or create a new key pair” pop-up window:
- Choose an existing key pair or create a new one.
- Download the private key (.pem file) if you are creating a new key pair.
- Click “Launch Instances” to finalize and launch your EC2 instance.

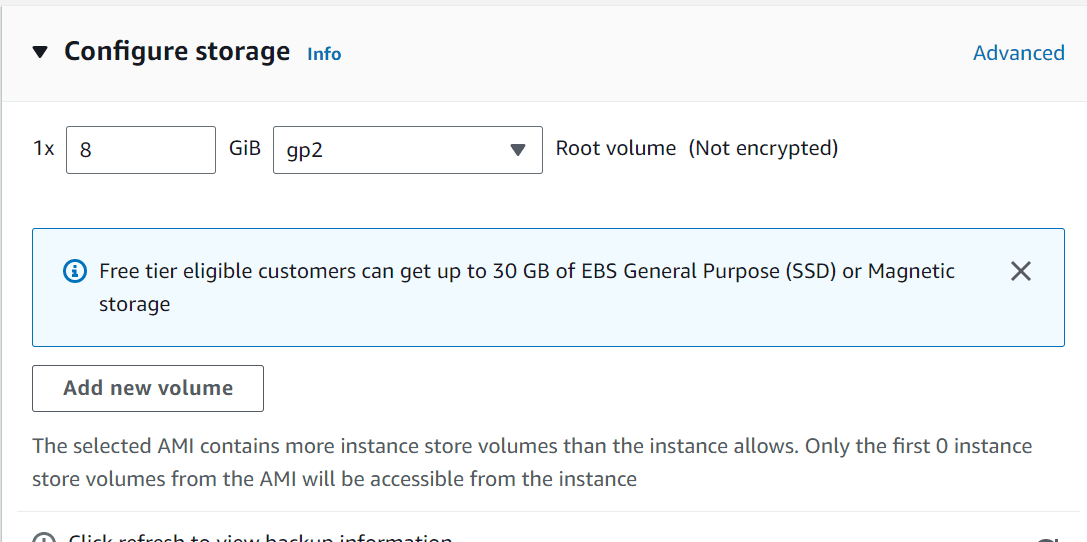
8: Add Storage
- In the “Add Storage” step:
- Specify the size and type of the root volume (EBS) for your instance.
- Add additional volumes if required.
- Click “Next: Add Tags” to continue.
9: Add Tags (Optional)
- In the “Add Tags” step:
- Optionally, add tags to your instance for better organization and management.
- Tags are key-value pairs (e.g., Name: MyEC2Instance).
- Click “Next: Configure Security Group” to proceed.
10: Configure Security Group
- In the “Configure Security Group” step:
- Create a new security group or select an existing one.
- Configure inbound and outbound rules to control traffic to and from your instance (e.g., SSH, HTTP, HTTPS).

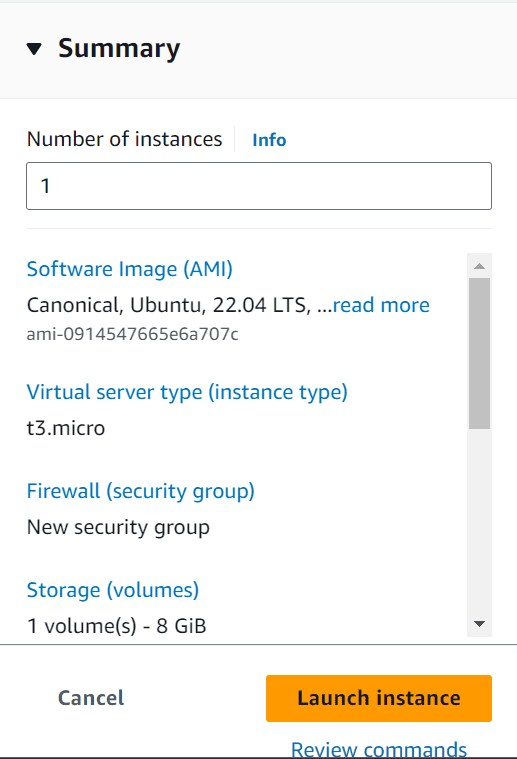
11: Review Instance Launch
- In the “Review Instance Launch” step:
- Review all the configuration details of your instance.
- Make sure everything is set up correctly.
- Click “Launch” to start the instance creation process.
12: Access Your EC2 Instance
- Once the instance is launched successfully, you can view its status in the EC2 Dashboard under “Instances.”
- Use the downloaded private key (.pem file) to SSH into your instance if it’s a Linux-based instance or use Remote Desktop Protocol (RDP) for Windows instances.
That’s it! You have successfully created an EC2 instance on AWS and can now start using it for your applications or development purposes. Make sure to manage and monitor your instances regularly through the AWS Management Console.
How to Generate a PuTTY Private Key (.ppk) File
1: Download PuTTY and PuTTYgen
- If you haven’t already, download PuTTY and PuTTYgen from the official PuTTY website: PuTTY Download
- Install PuTTY on your Windows machine. During the installation process, PuTTYgen should also be installed.
2: Convert the Private Key to PuTTY Format (.ppk)
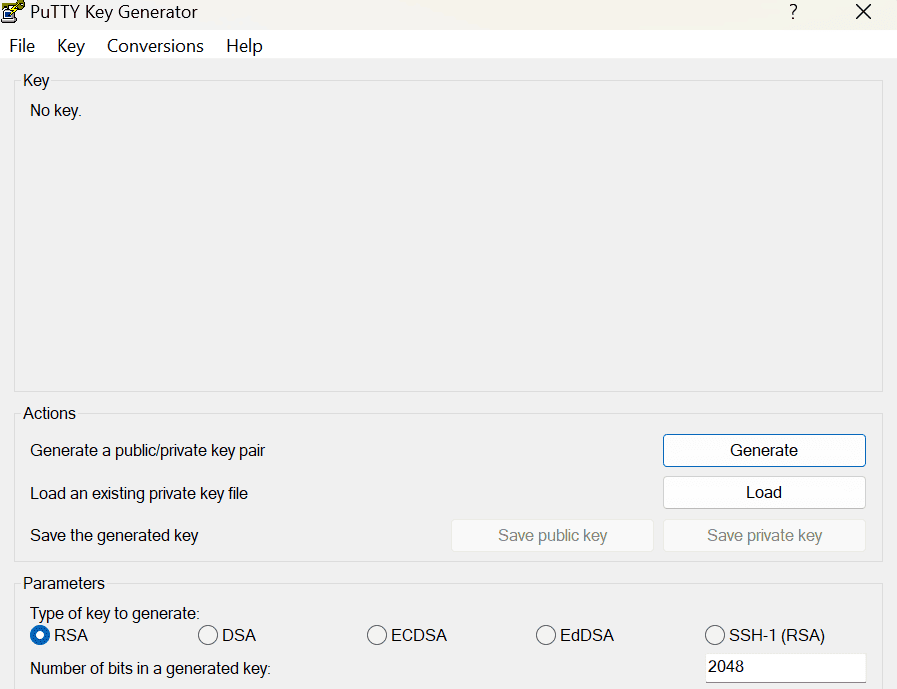
- Open PuTTYgen by searching for it in your Windows start menu or by running
puttygen.exefrom the PuTTY installation directory. - In PuTTYgen, click on the “Load” button.
3. By default, PuTTYgen filters for “PuTTY Private Key Files (.ppk).” Change the file type filter to “All Files (.*)” to see your .pem private key file.
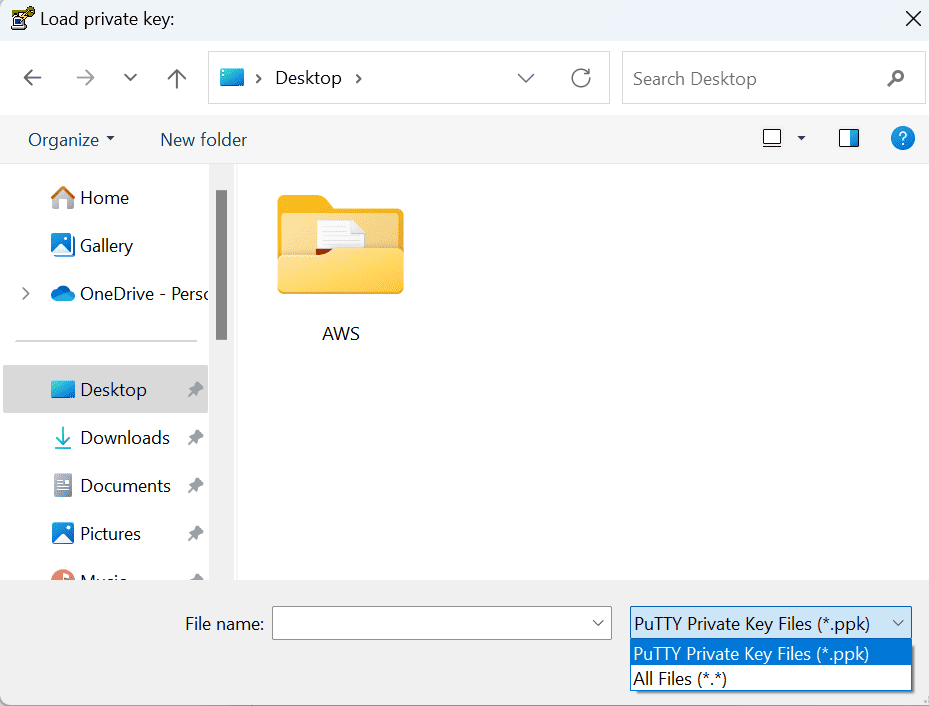
4. Navigate to the location of your .pem private key file, select it, and click “Open.”
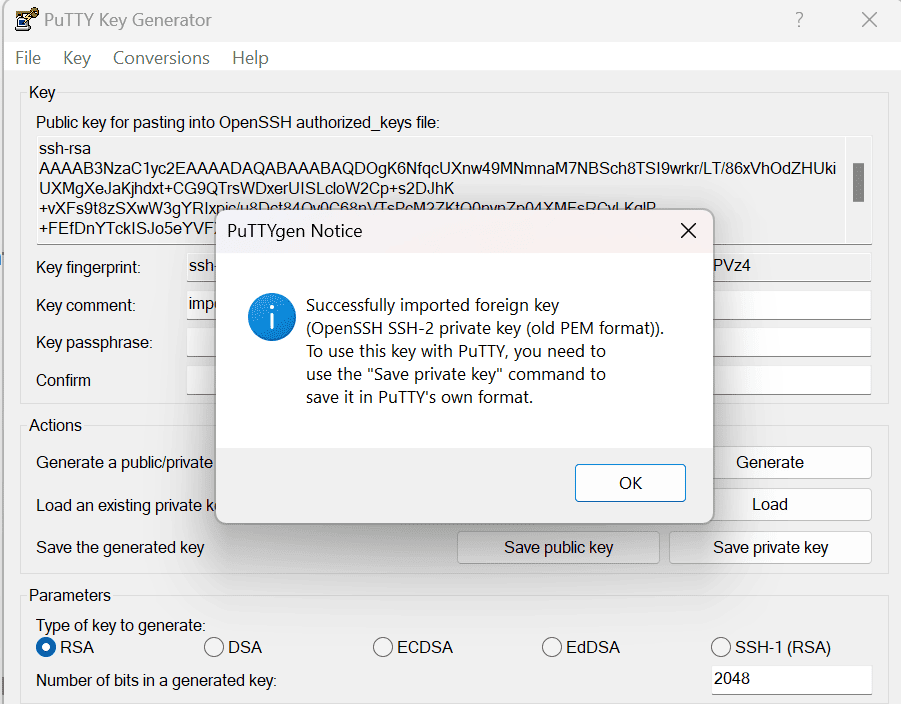
5. PuTTYgen will prompt you to confirm the conversion of the key. Click “OK” to continue.
6. Optionally, you can set a passphrase for added security by entering it in the “Key passphrase” and “Confirm passphrase” fields. This step is optional but recommended.
7. Click on the “Save private key” button to save the converted private key in PuTTY’s .ppk format.
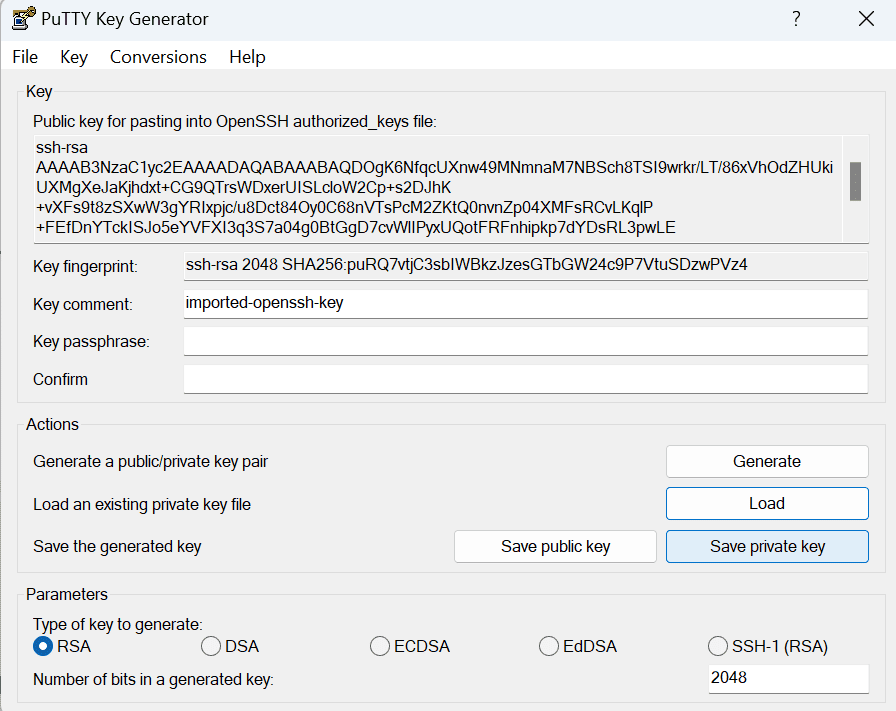
8. Choose a location to save the .ppk file and give it a descriptive name (e.g., mykey.ppk).
9. Click “Save” to complete the process.
Now you have successfully generated a PuTTY Private Key (.ppk) file from your original private key (.pem) file. This .ppk file can be used with PuTTY to connect securely to your AWS EC2 instances or other SSH servers. Remember to keep your private key files secure and never share them publicly or with unauthorized individuals.
How to Connect EC2
- Open PuTTY on your Windows machine.
- In the “Category” pane on the left, expand the “SSH” category and click on “Auth.”
- Click on the “Browse” button next to “Private key file for authentication” and select the .ppk file you generated in Step 2.

4. Go back to the “Session” category in the “Category” pane.
5. Enter the EC2 instance’s Public IP address into the “Host Name (or IP address)” field.
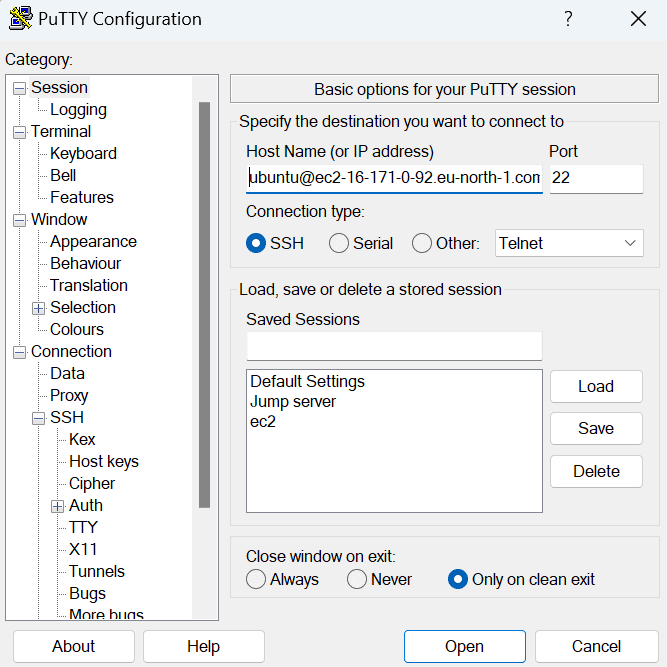
6. Optionally, enter a name for your session in the “Saved Sessions” field and click “Save” to save these settings for future use.
7. PuTTY will open a terminal window and attempt to establish an SSH connection to your EC2 instance.
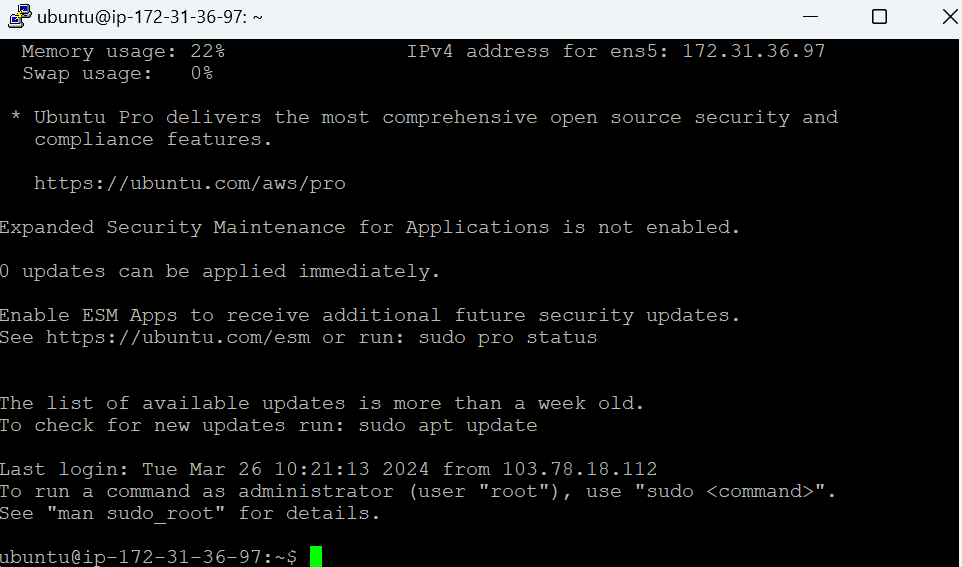
You are now connected to your EC2 instance via SSH using PuTTY. You can run commands and manage your instance from the terminal window.
Conclusion
In conclusion, this article has outlined the steps to connect to your EC2 instance using PuTTY, including obtaining the instance’s Public IP, converting the private key to PuTTY format, configuring PuTTY sessions, and establishing an SSH connection. By following these steps, you can efficiently manage your EC2 instances on AWS from your Windows machine using PuTTY.