Spam emails clutter your inbox and can possibly compromise the security of your email communications. cPanel control panel offers robust spam filtering capabilities that can combat this issue.
In the following sections, we will discuss the steps to configure spam filters in cPanel.
Steps to access cPanel’s spam filters
To get started, follow these simple steps:
- Start by logging in to your cPanel account.
- Navigate to the “Email” section and select “Spam Filters.”
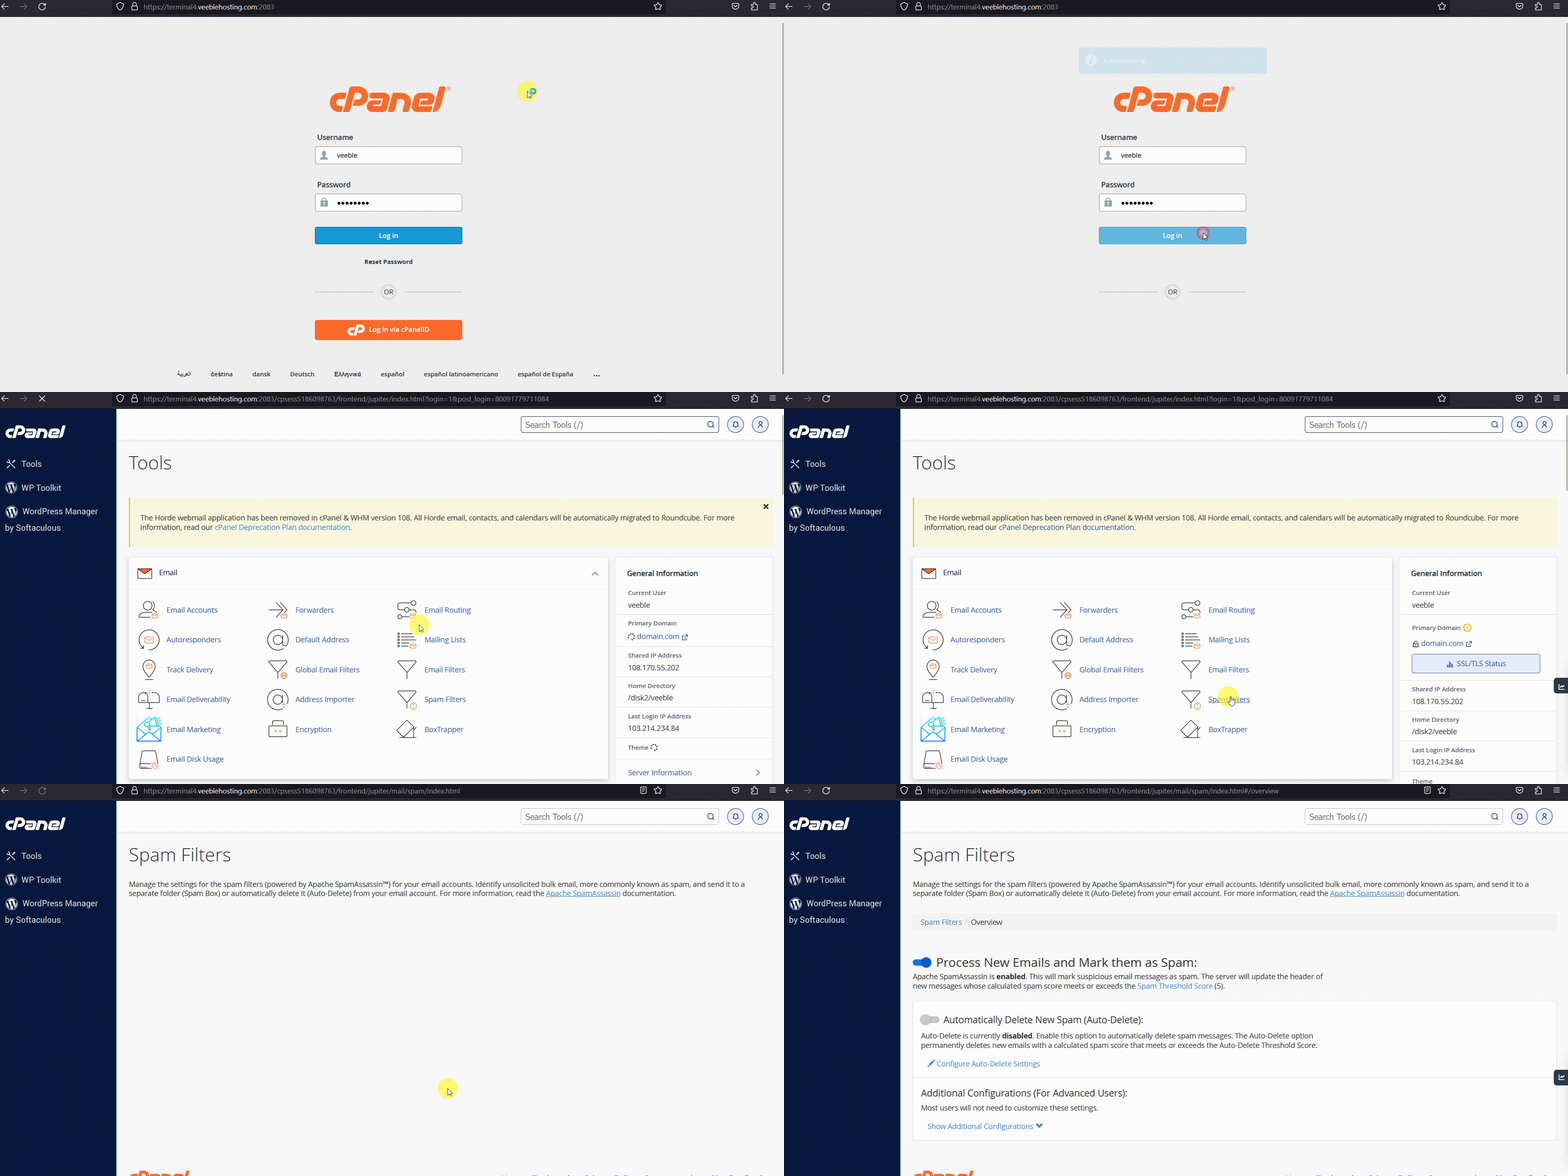
Here you can configure SpamAssassin which is a tool in cPanel to filter out unwanted mail.
Steps to configure SpamAssassin
When it comes to configuring Apache SpamAssassin, here’s what you need to do:
- Click “Spam Filters” from the email section.
- Enable Apache SpamAssassin by clicking the “Enable Apache SpamAssassin” button.
- Customize the settings and additional options according to your specific requirements.
- Save your changes by clicking the “Save” button.
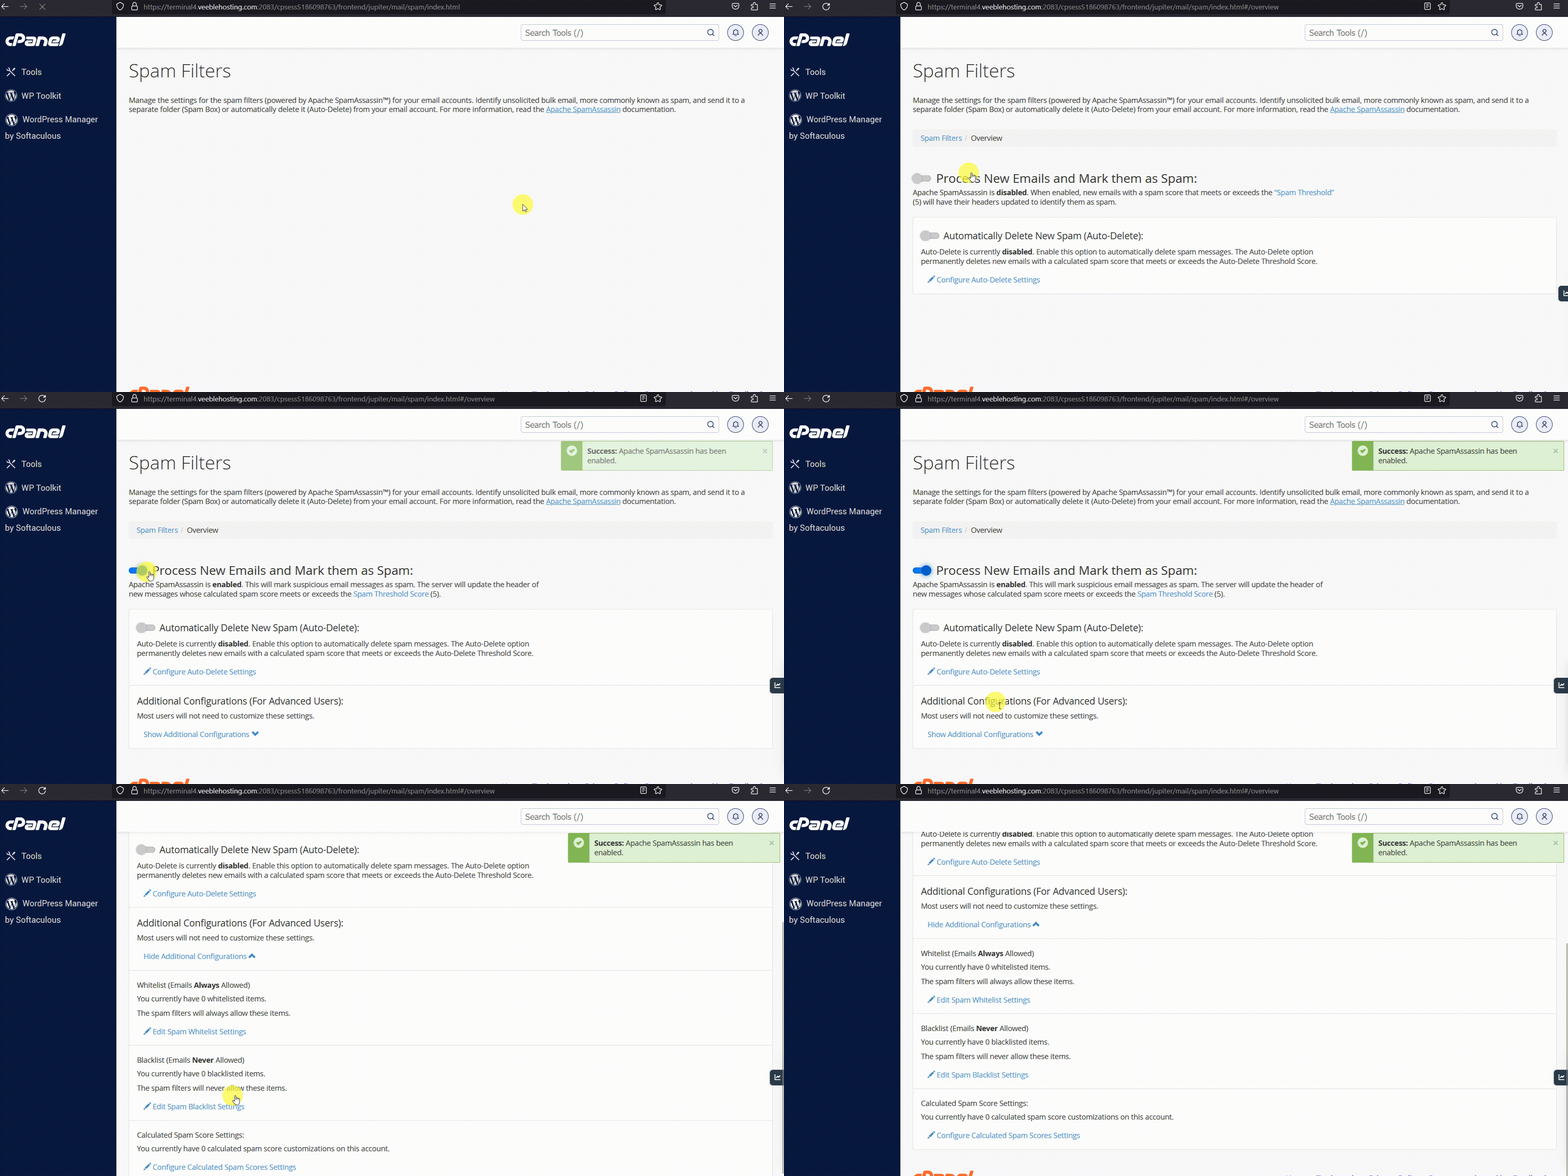
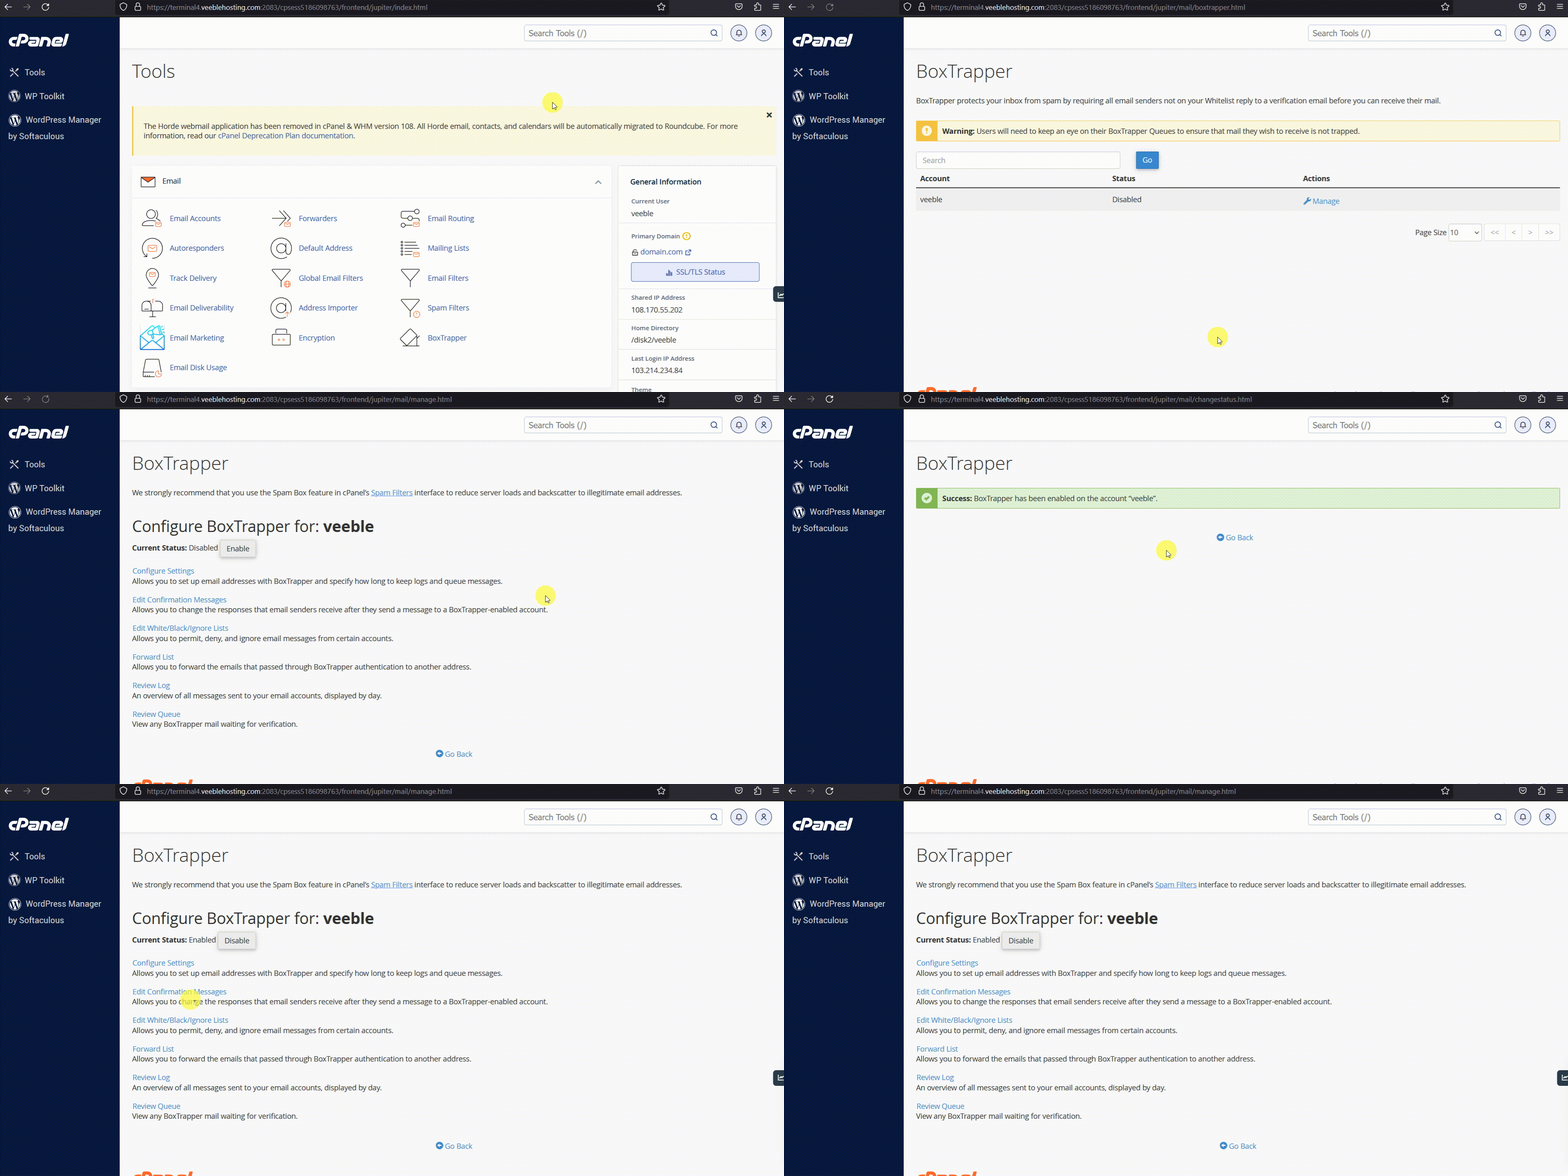
Another feature to throw out spam is configuring BoxTrapper. This function uses challenge-response verification to remove spam from your email. When a BoxTrapper-enabled account receives an email, BoxTrapper immediately replies with a verification email. The mail will only reach your inbox once the sender has been verified by BoxTrapper.
Steps to configure BoxTrapper
To get started, follow these simple steps:
- In the “Email” section, click on “BoxTrapper.”
- Select the “Manage” option for the desired email account.
- Customize the configuration settings, including email verification, whitelist, blacklist, and more.
- Apply your changes by clicking the “Save” button.
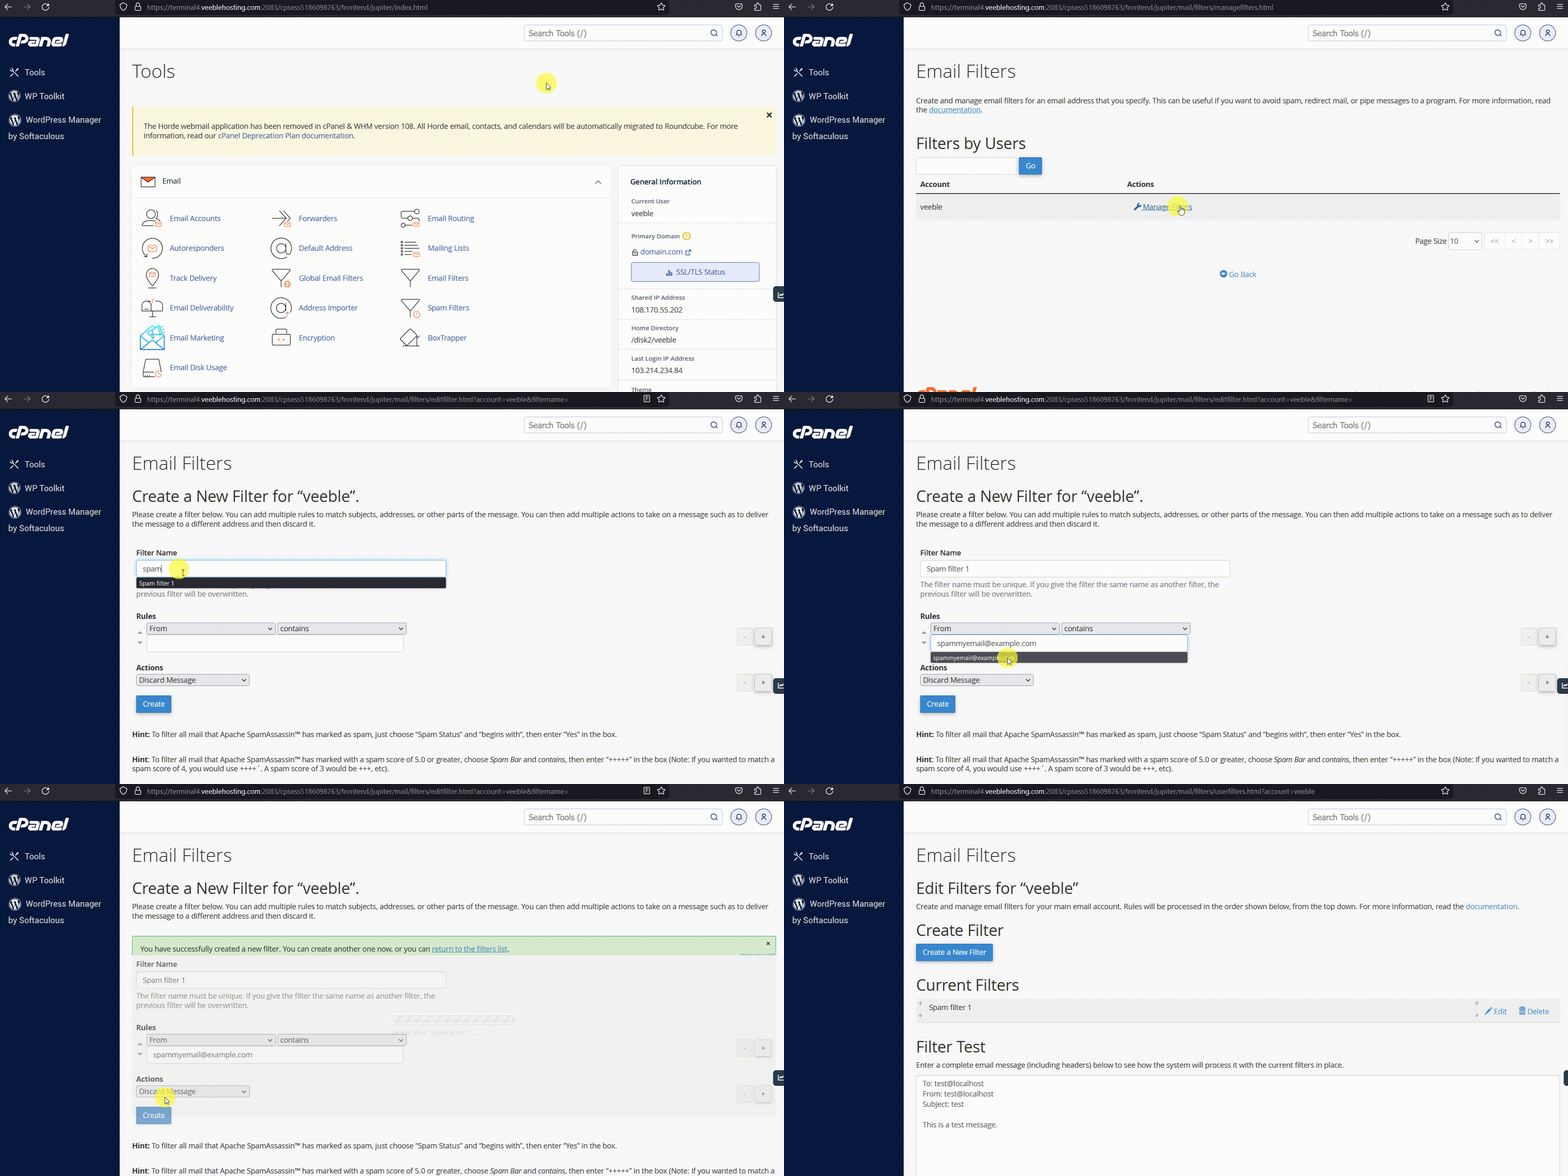
Email filtering allows you to establish rules for incoming emails, enabling you to sort and categorize them based on specific conditions and keywords you define.
Steps to configure email filtering
When it comes to configuring email filtering, the following steps will guide you:
- Under the “Email” section, click on “Email Filters.”
- Choose “Manage Filters” for the desired email account you need to set.
- Create a new filter by clicking “Create a New Filter.”
- Define filter rules by specifying conditions such as “From,” “Subject,” or “Body.”
- Select the appropriate action for filtered emails, such as “Discard” or “Redirect to.”
- Save your filter by clicking “Create” or “Save.”
Managing Spam Box and Whitelist/Blacklist:
To Manage the Spam Box:
If you need to manage your Spam Box, follow these steps:
- Navigate back to “Spam Filters.”
- Adjust settings such as automatic deletion or manual review according to your preferences.
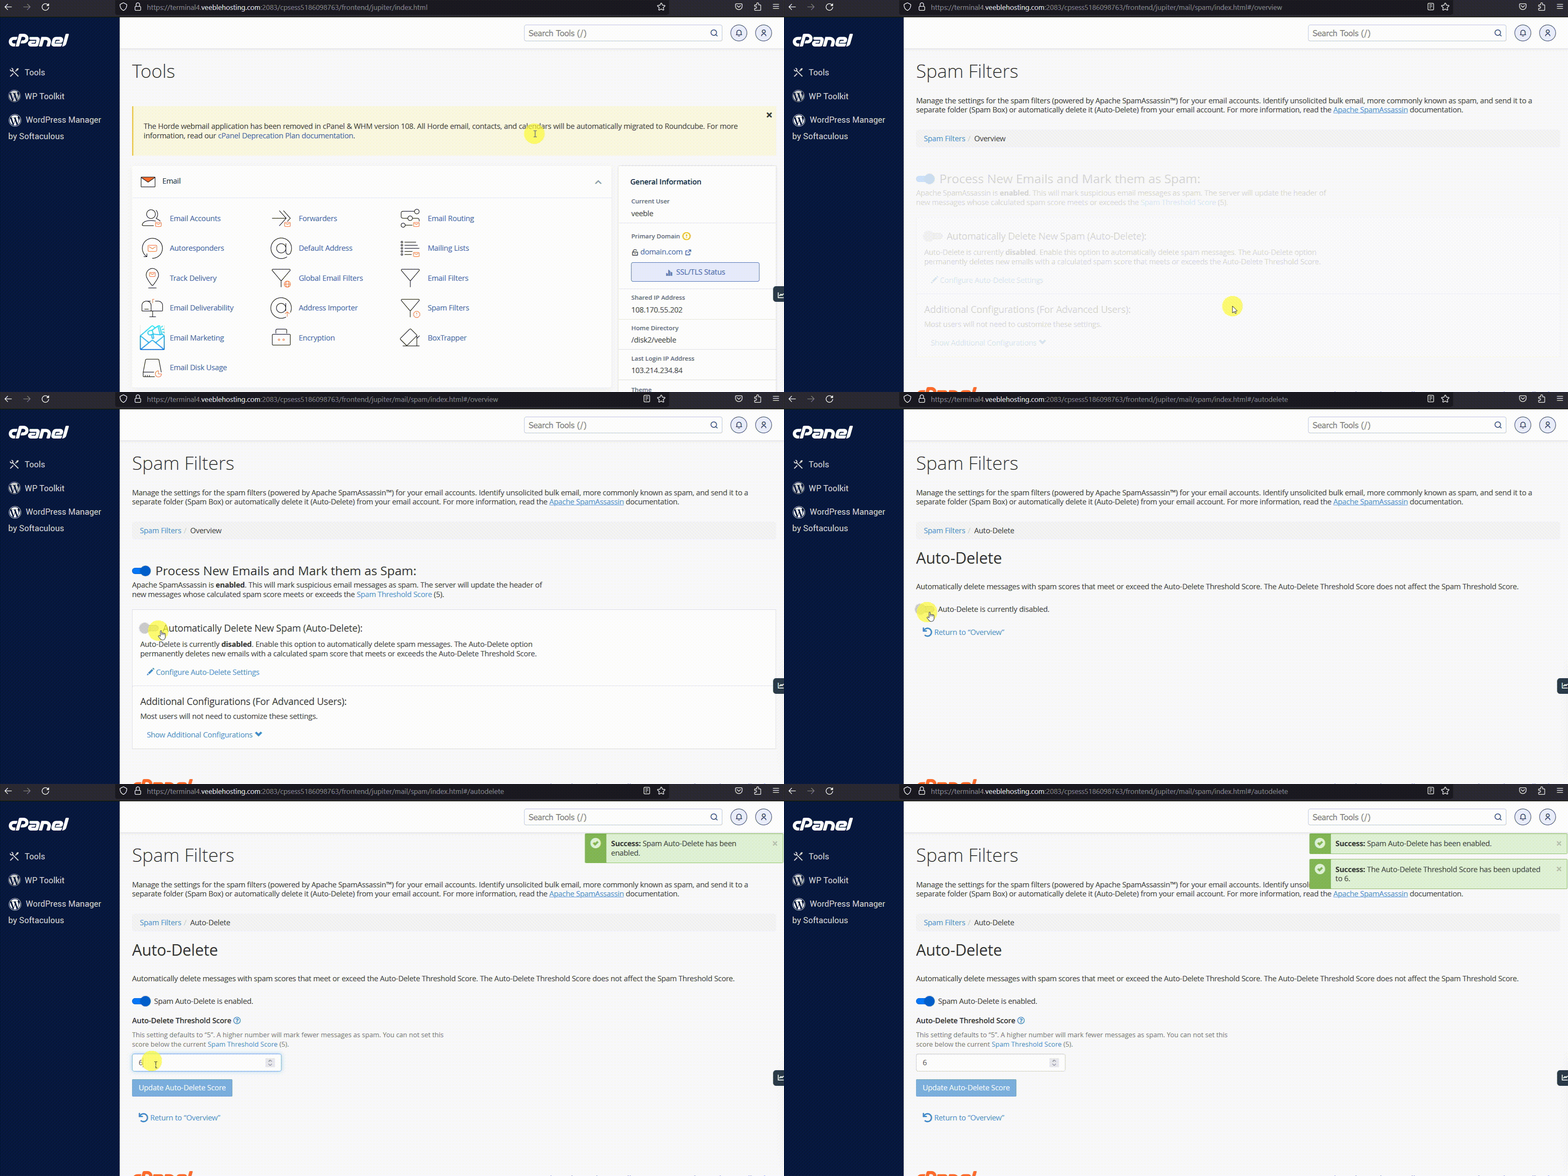
If Apache SpamAssassin incorrectly classifies an email address as spam or non-spam, you can whitelist or blacklist those email addresses from within the Spam Filters window.
Steps to configure whitelist/blacklist mails
When it comes to managing your Whitelist and Blacklist, consider the following steps:
- Select “Show Additional Configurations” within the same window.
- Choose “Edit Spam Whitelist Settings” to add an email address to your whitelist or select “Edit Spam Blacklist Settings” to add an email address to your blacklist.
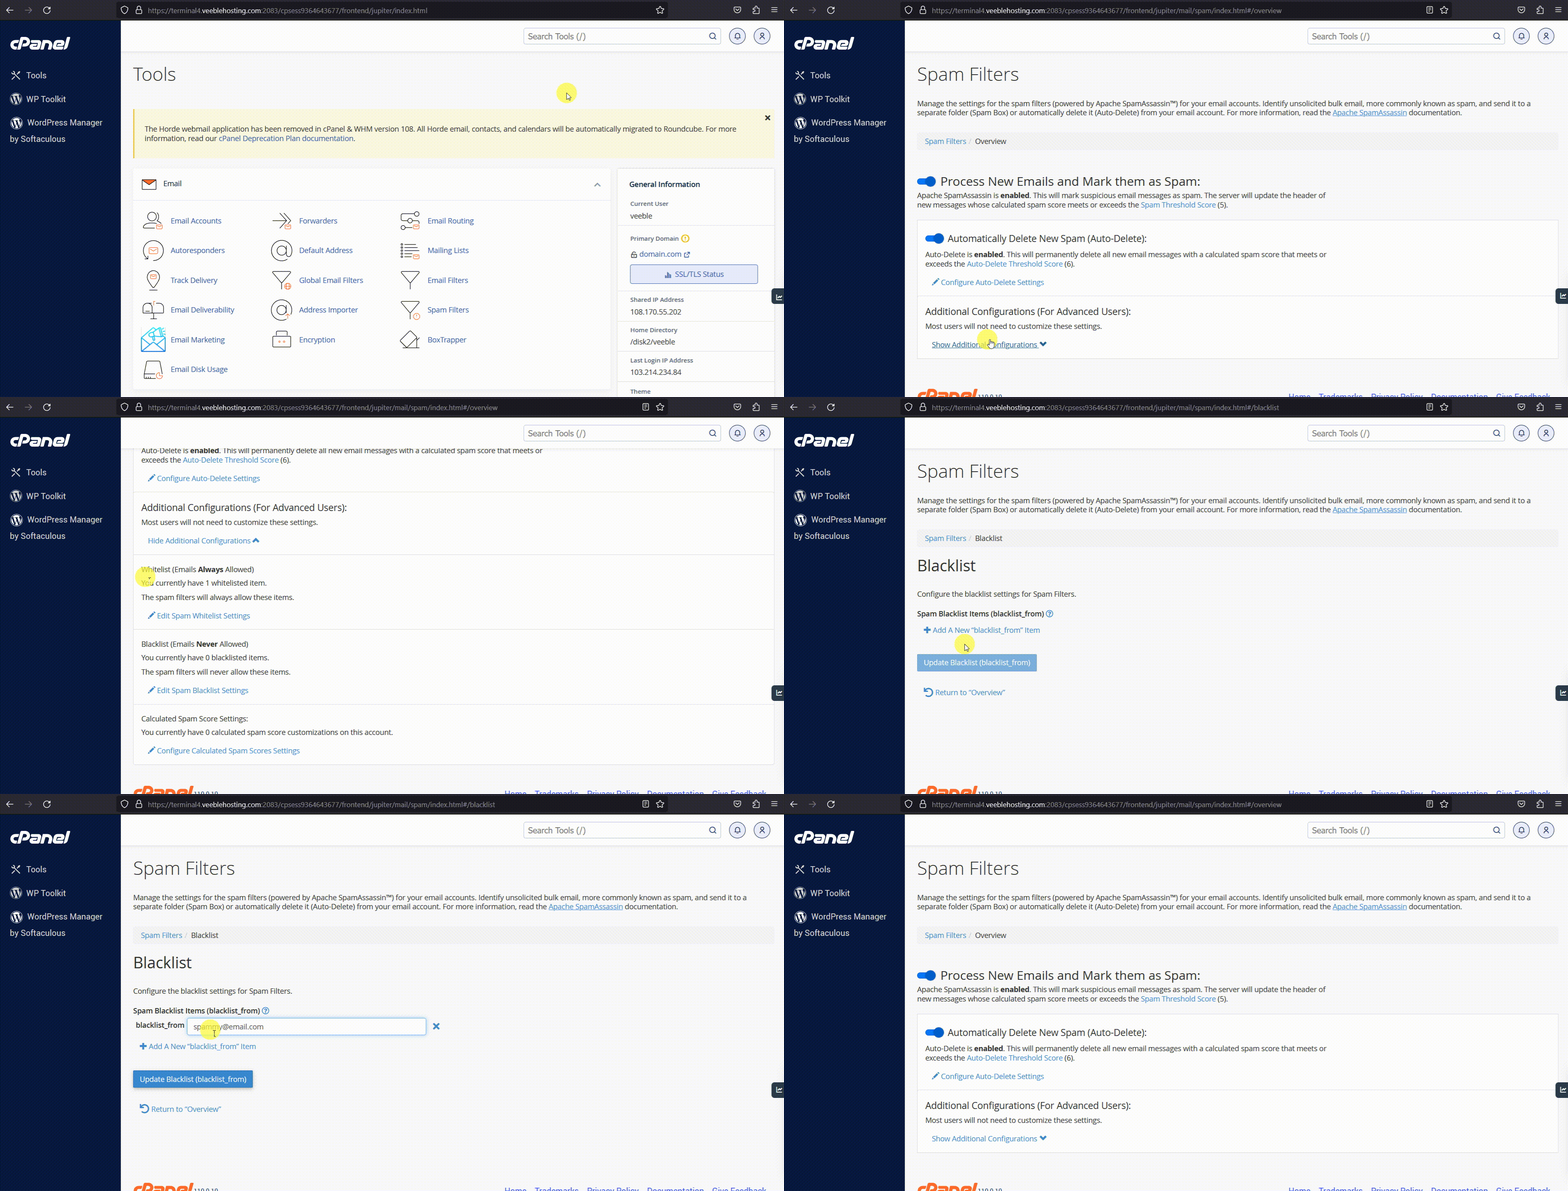
By configuring these spam filters in cPanel you can keep your communication secure and have a clutter-free inbox.
