
Accessing a Linux server from a Windows environment is a common requirement for server administrators, developers, and IT professionals. Indeed, one of the most secure and widely used methods for achieving this connectivity is through SSH (Secure Shell), which notably allows encrypted communication with a remote server. PuTTY is a versatile tool for this purpose, providing an easy-to-use interface to access linux server from windows(SSH connection). This guide will walk you through the steps to set up and use PuTTY for accessing your Linux server from a Windows machine.
Prerequisites
- A Linux server with SSH service running and you have the IP address or domain name of the server.
- Credentials (username and password or SSH key) to access the server.
- A Windows machine with internet connectivity.
1: Download and Install PuTTY
- Navigate to PuTTY’s official website: Go to the PuTTY download page (https://www.putty.org/) to download the latest version of PuTTY.
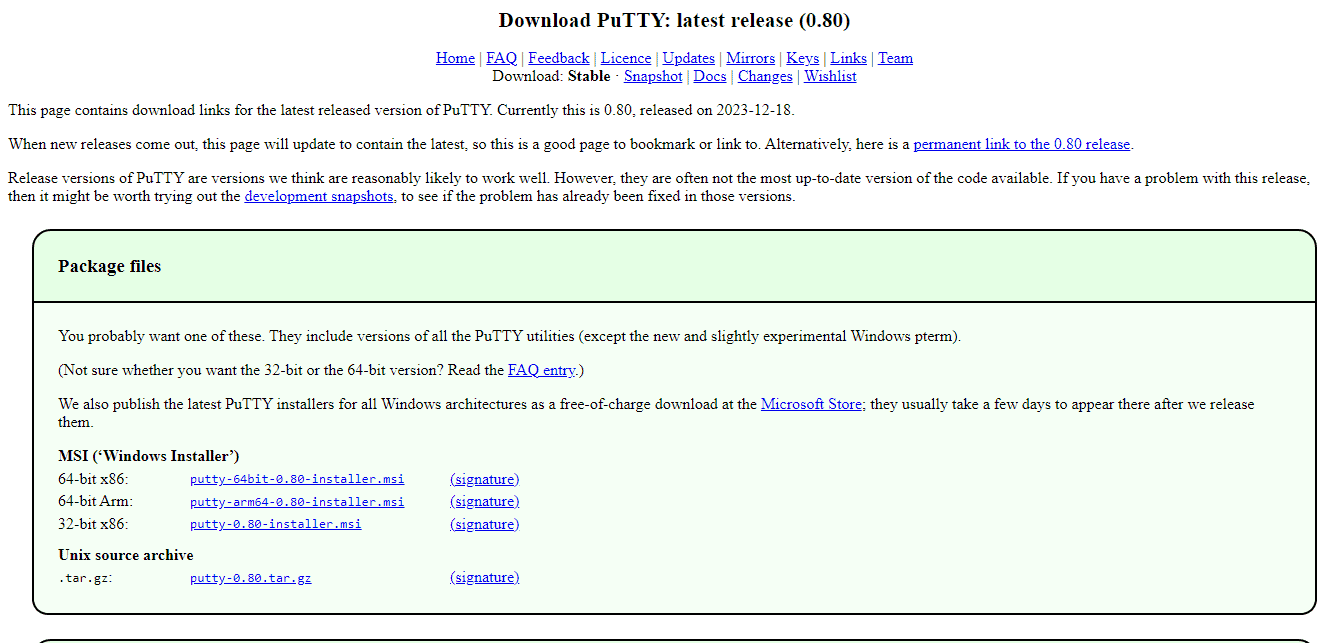
2. Download PuTTY: Choose the appropriate installer based on your Windows architecture (32-bit or 64-bit). Download the .exe file for PuTTY.
3. Install PuTTY: Run the downloaded installer and follow the on-screen instructions to install PuTTY on your Windows machine.

2: Launch PuTTY
- Open PuTTY: Once the installation is completed, open PuTTY from your Windows start menu or by searching for it.
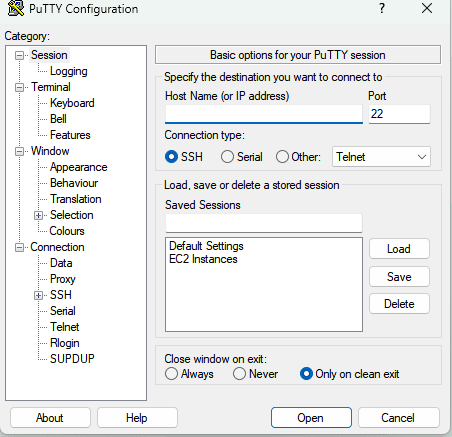
- PuTTY Configuration Window: The PuTTY Configuration window will appear. This is where you will configure your connection settings to access the Linux server.
3: Configure Your Connection
Session Category: In the PuTTY Configuration window, ensure the ‘Session’ category is selected on the left panel.
Host Name (or IP address): Enter the IP address or domain name of your Linux server in the ‘Host Name (or IP address)’ field.
Port: The default SSH port is 22. Ensure this is entered in the ‘Port’ field unless your server uses a different port for SSH.
Connection Type: Make sure ‘SSH’ is selected as the connection type.
Saved Sessions: You can save these settings for future sessions by entering a name under ‘Saved Sessions’ and clicking ‘Save’.

4: Start the SSH Session
- Open Connection: Click ‘Open’ at the bottom of the PuTTY Configuration window to initiate the SSH connection to your Linux server.
- Security Alert (first-time connection): When first time you connects to a server, you may see a security alert about the server’s RSA key not being cached in PuTTY. Click ‘Yes’ to proceed and cache the key, ensuring secure connections in the future.
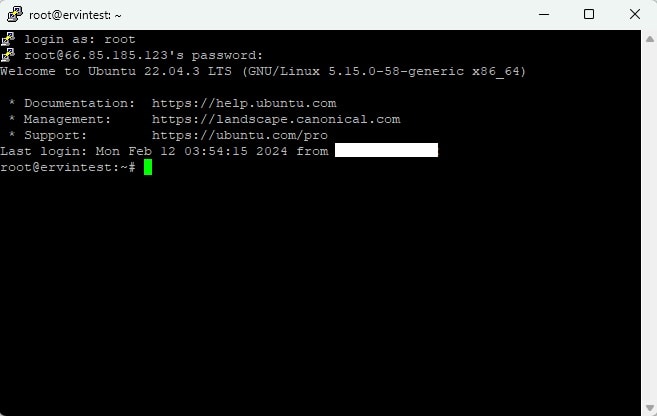
- Login Credentials: Once SSH connected, you will be prompted to enter your username and password for the Linux server. If you’re using SSH keys for authentication, you’ll need to have configured this beforehand in PuTTY’s SSH/Auth section by specifying the path to your private key file.
5: Interacting with Your Linux Server
- Once logged in, you can interact with your Linux server using the command line. Once connected, you’ll have access to the shell prompt, where you can execute Linux commands as per your requirements.
This guide aims to assist you in successfully accessing a Linux server from a Windows machine using PuTTY and SSH. Firstly, it’s essential to download and install PuTTY, a widely-used SSH client for Windows. Next, configure PuTTY with your server’s IP address and SSH port details. After establishing a connection, you should be able to interact with your Linux server through the command line. Lastly, always ensure your server and client software are up-to-date to benefit from the latest security features and bug fixes.