If you’ve stumbled upon this guide, you’re probably looking to enhance your organization’s security by securing your production servers, just like I did a while ago. I’m here to walk you through setting up a VPN using OpenVPN, based on my experience. Let’s get started, shall we?
Architectural Overview
Initially, we used a less secure practice of directly logging into our servers. In order to improve security, we have transitioned to a more robust approach by implementing OpenVPN servers and instances. In this approach, we are setting up a VPN service on one server and a separate Jump server for secure access to the production servers/services.
Prerequisites
A server instance with Almalinux 8.x installed.
Necessary credentials and privileges to access and configure the server.
OpenVPN Server Configuration
1. Initial Setup
Login: Connect to your server instance with appropriate user credentials.
Superuser Access: Switch to superuser for administrative tasks:
sudo su
2. Server Configuration Initialization
Run the command below to initialize or reinitialize the server configuration.
ovpn-init --force
Follow on-screen instructions, opting for default settings when prompted.
3. User Password Setup
Set a secure password for the default ‘openvpn’ user:
passwd openvpn
4. Admin Panel Access
Access the OpenVPN admin panel through your browser at https://[your-server-ip]:943/admin.
Log in using the ‘openvpn’ user credentials.
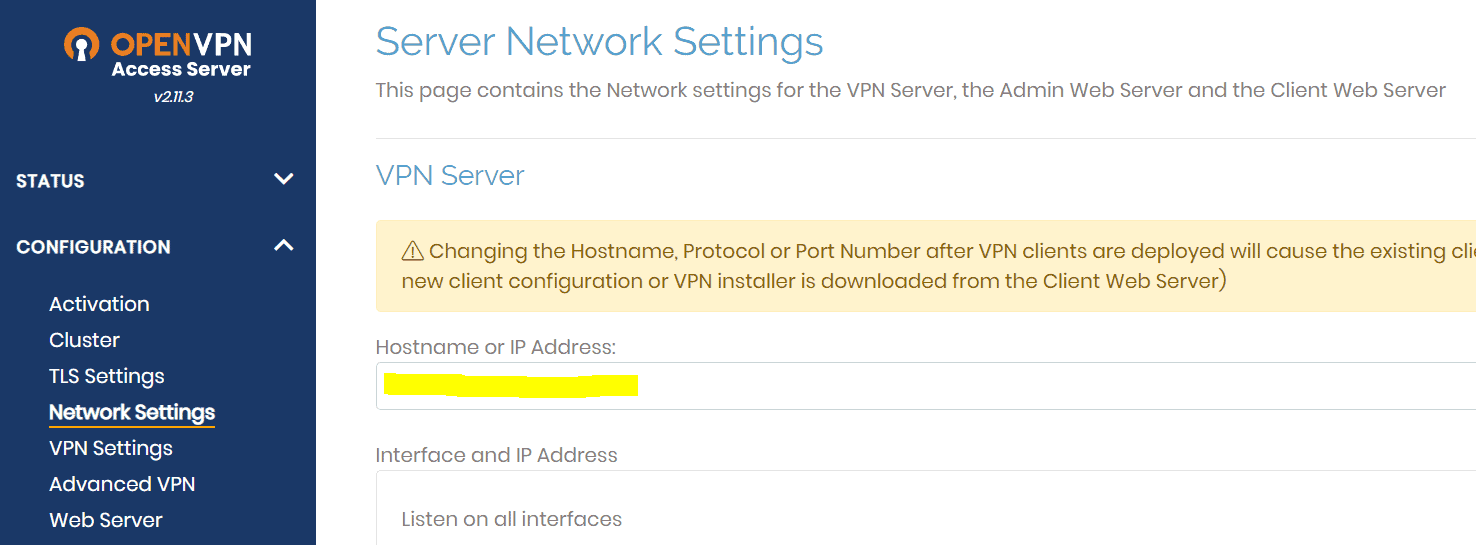
5. Hostname and DNS Configuration
Update your DNS settings to point your server IP to your desired subdomain.
Update the server’s hostname with the below command
hostnamectl set-hostname [your-subdomain]
Reflect this change in the OpenVPN Admin Panel under Configuration > Network Settings.
6. Licensing
Purchase and activate a license for OpenVPN Server from the official OpenVPN pricing page.
7. User Management for Client VPN
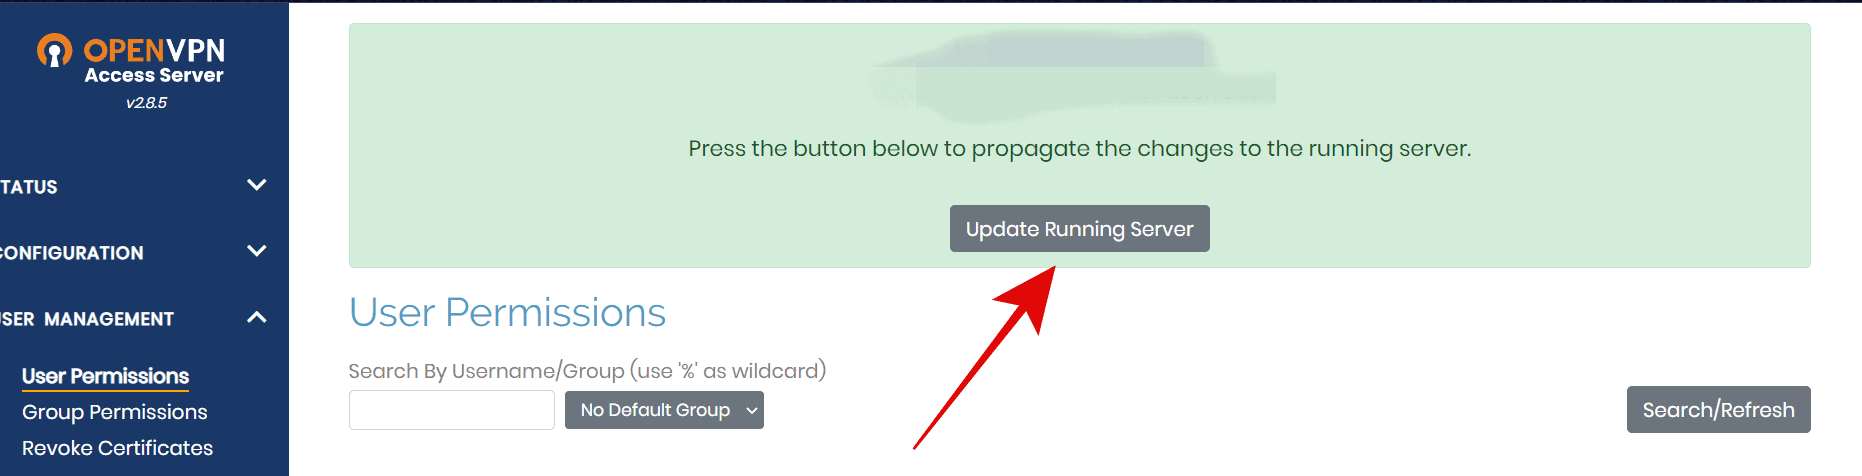
In the Admin Panel, navigate to User Management > User Permissions.
Create a new user and configure as needed, ensuring the ‘Auto-login’ option is enabled if necessary.
8. Multi-Factor Authentication (Optional)
If desired, enable Google Authenticator MFA from the Authentication tab.
9. SSL Certificate Configuration
Generate a CSR and private key on your server.
Obtain an SSL certificate from your preferred provider and upload it through the Admin Panel under Configuration > Webserver.
10. Configuration and User Profile
Save all changes and update the running configuration as prompted.
Download the user profile for VPN access from https://[your-configured-subdomain].
Jump Server Configuration
1. Allow only VPN IP
If you are using a cloud instance as a Jump server, you can configure security by configuring firewall rules within the security panel to permit connections exclusively from the VPN’s IP address to the Jump Server instance. This ensures that only authorized VPN connections can access the Jump server, bolstering your network’s security.
For example, if you are using an AWS instance as a Jump server, follow the following steps:
1. Log in to the AWS Management Console:Sign in to your AWS account using your credentials.
2. Navigate to the EC2 Dashboard:Once logged in, go to the EC2 dashboard.
3. Select the Jump Server Instance:In the EC2 dashboard, select the Jump server instance for which you want to configure security group rules.
4. View the Security Group:In the details pane at the bottom, under the “Description” tab, you’ll find the security group associated with the selected Jump server instance. Click on the security group name to access its configuration.
5. Edit the Inbound Rules:In the security group details, go to the “Inbound rules” tab.
6. Add a New Rule:Click the “Edit inbound rules” button, then click “Add rule” to create a new rule.
Specify the Rule:
Set the rule as follows:Type: Choose the appropriate protocol and port(s) for the service you want to allow. For example, if it’s SSH, select “SSH (22)” or customize it according to your application’s needs.
Source: Enter the IP address or IP range of your VPN service. You can specify a single IP, a range, or a specific security group associated with your VPN server.For example, if your VPN server’s IP is 1.2.3.4, you can enter “1.2.3.4/32” to allow only that specific IP.
7. Review and Save:Review the rule settings to ensure they are correct, and then click “Save rules.”
8. Confirm the Changes:AWS will prompt you to confirm the changes. Click “Save rules” again to apply the new security group rule.
If you are using an on-premise server or VPS as the Jump server, you can configure the necessary firewall rules directly within the firewall management tools available on that server or VPS.
Refer Docs: Ubuntu, Redhat, Windows
2. Implement SSH Keys
Generate an SSH Key Pair by using the ‘ssh-keygen’ command, which will create a key pair. Share the Public Key by sending the contents of the ‘id_rsa.pub’ key file to the production server and appending it to the ‘/.ssh/authorized_keys’ file. Finally, test the SSH key by attempting to log in with ‘ssh user@remote-server’ for secure and passwordless access. These steps ensure a streamlined and secure connection process between your local and remote machines.
Refer Doc: https://www.veeble.org/kb/ssh-login-without-password/
Production Server Configuration
1. SSH Configuration in your Servers
Modify the SSH daemon configuration to disable password authentication:
This file is typically located at /etc/ssh/sshd_config. You can use a text editor like ‘nano’ or ‘vim’ to edit the file:sudo nano /etc/ssh/sshd_config
PasswordAuthentication no
Restart the SSH service to apply changes:
service sshd restart
If your clients are granted access to the server through separate user accounts provided to them, you have the option to disable root user login as an alternative to disabling PasswordAuthentication as previously mentioned. Disabling root login enhances security by preventing direct root access to the server. Here are the steps to execute this on a Linux server:
1. Login as a Superuser: Start by logging into your server as a superuser or with superuser privileges using the command sudo.
2. Create an Alternate User Account: Create a new user account that your clients will use to access the server. You can create a new user named ‘clientuser’ with the following command:sudo adduser clientuser
Follow the prompts to set a password and provide any required information.
3. Grant Sudo Permissions: To allow the new user to perform administrative tasks, you can grant them sudo permissions. Add the user to the ‘sudo’ group using the following command:sudo usermod -aG sudo clientuser
4. Test the New User Account: Log out of the root account and log in as the new user to ensure that it has the necessary permissions:su - clientuser
You should now be logged in as ‘clientuser’.
5. Disable Root Login: To disable direct root login, open the SSH configuration file in your preferred text editor. This file is typically located at /etc/ssh/sshd_config. You can use a text editor like ‘nano’ or ‘vim’ to edit the file:sudo nano /etc/ssh/sshd_config
Inside the configuration file, find the line that says PermitRootLogin yes and change it to:PermitRootLogin no
6. Save and Exit: In ‘nano’, you can save the changes by pressing Ctrl+O, then press Enter, and exit by pressing Ctrl+X.
7. Restart SSH Service: To apply the changes, restart the SSH service:sudo systemctl restart ssh
Connecting to Your VPN
Import the downloaded .ovpn file into your OpenVPN client software.
Connect to the VPN using the provided credentials.
Visit https://[your-configured-subdomain] and log in using the provided credentials with the .ovpn file loaded in it.
Please ensure all configurations and credentials are kept secure and confidential.