A Certificate Signing Request (CSR) is a block of encoded text housing essential data for your SSL certificate. To generate an SSL certificate, you must submit the CSR to a Certificate Authority (CA), who will then issue the certificate for your website’s secure communication.

On Windows operating systems, the creation of Certificate Signing Requests (CSR) for SSL certificates is greatly aided by the Microsoft Management Console. MMC serves as a centralized framework that offers a single interface for managing different system configurations. Administrators can create and manage CSRs in MMC by using certain security-related snap-ins, like Certificate Manager. Using the MMC interface, this simplified method submits CSRs to Certificate Authorities for digital identity certificate acquisition, ensuring a uniform and effective process. Other than this there are also some other methods to obtain CSR on windows, but for this tutorial, we will cover using MMC.
Follow the steps to create CSR via Microsoft Management Console:
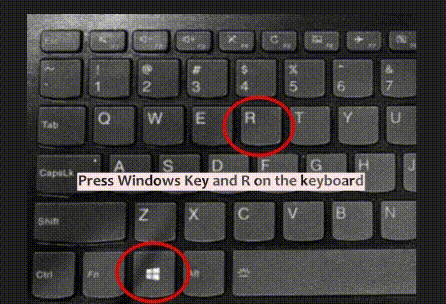
- Hold down the Windows key (the one with the Windows logo on it) and tap the R key on your keyboard. This should bring up a small window called “Run”.
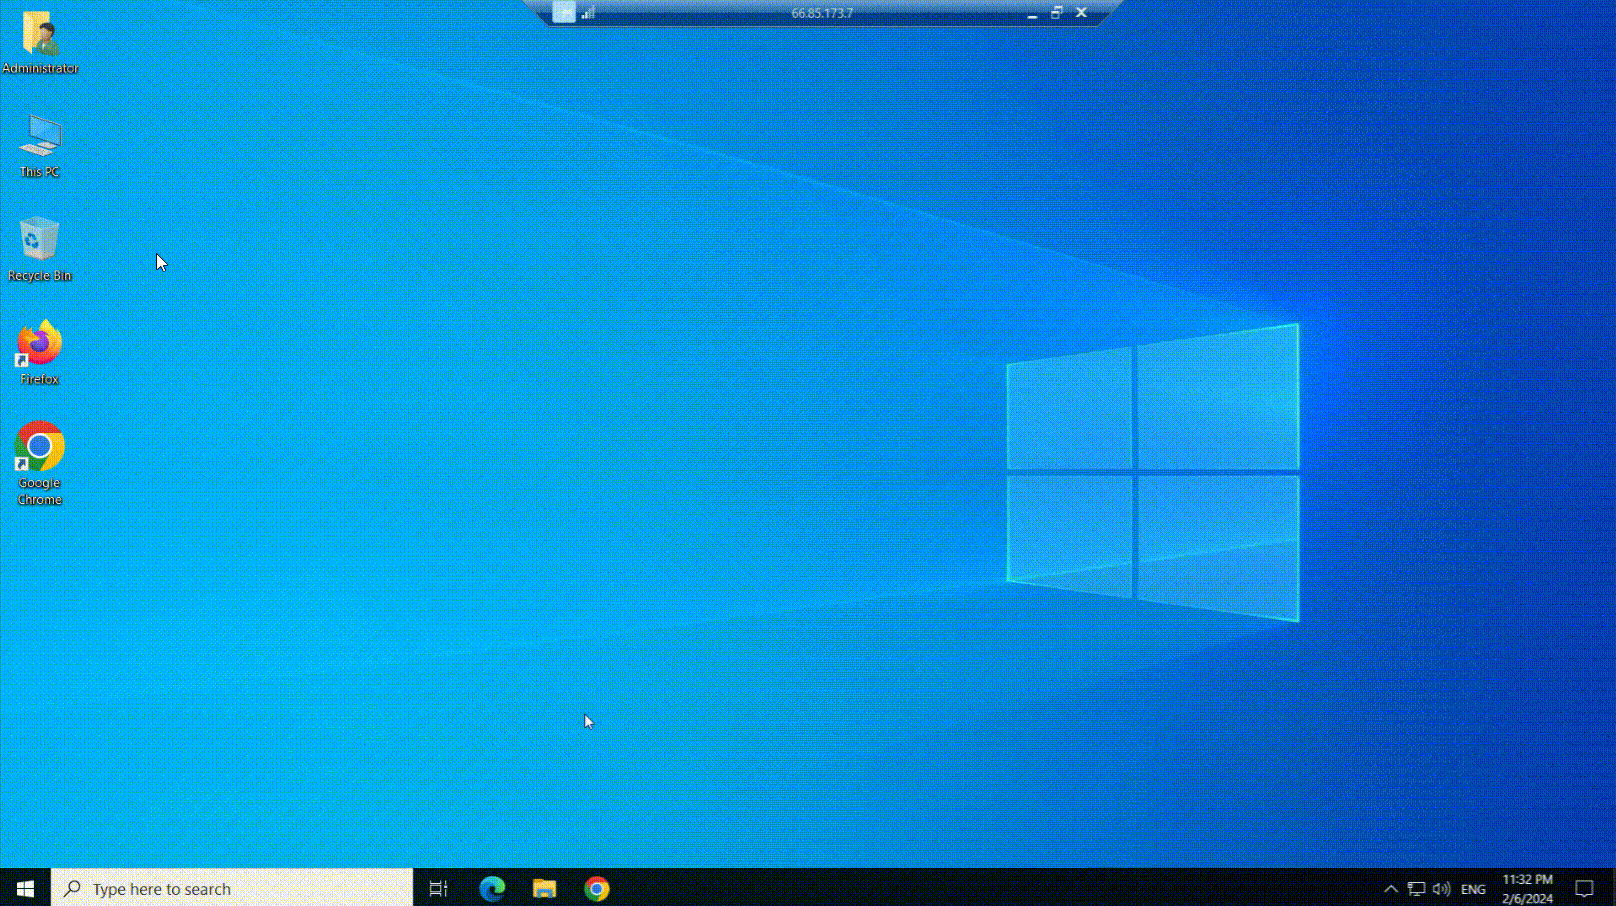
- Once the “Run” window is open, type in “MMC” without the quotes and hit the Enter key. This action should open up a program called Microsoft Management Console.
- Now, in the Microsoft Management Console window, click on the “File” menu at the top-left corner.
- From the options in the “File” menu, choose “Add/Remove Snap-in“. It should open a new window.
- In the “Add or Remove Snap-ins” window, scroll down the list until you find “Certificates“. Click on it to select it, then click the “Add” button.
- After clicking “Add”, you’ll see a window asking you to choose the type of account. Depending on what you’re doing, you’ll want to pick either “Computer account” or “User account“. For most cases, “Computer account” is the right choice.
- Once you’ve selected the account type, click “Next“.
- In the next window, make sure “Local computer” is selected, then click “Finish” and finally “OK” button.
- Expand “Certificate” on the left pane and Right-click on the “Personal” folder, then go to All Tasks > Advanced Operations > Create Custom Request, and proceed.
- Now, you’ll be in the CSR Wizard. Follow these steps:
a. Choose “Proceed without enrollment policy“.
b. Make sure the template is set to “CNG key” and the request format is “PKCS #10“.
c. Click on “Properties” under custom request.

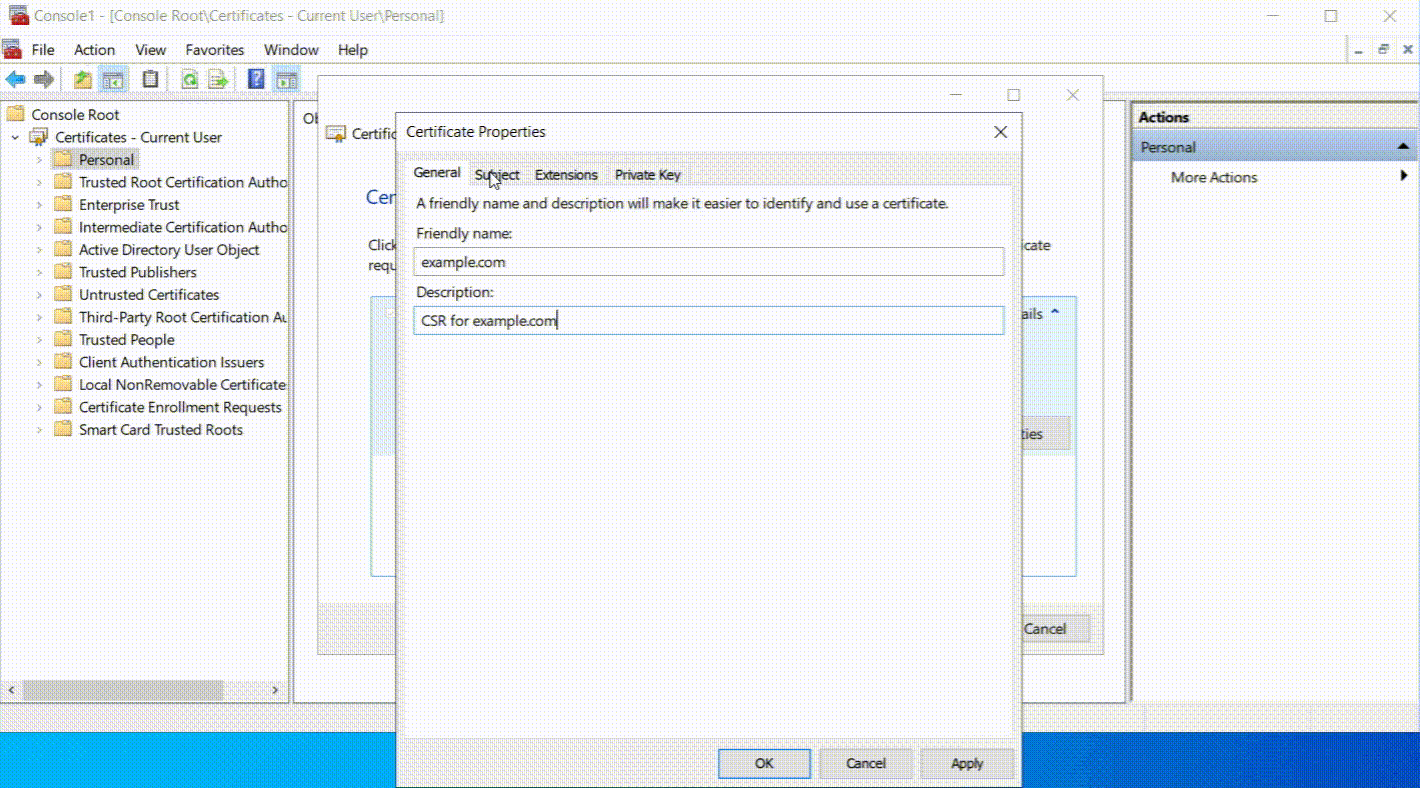
- On the following screen, you’ll see the General tab. Here, assign a name to your certificate that is easily identifiable by you. This is not part of the certificate itself, but it helps you to recognize it in the list of certificates.

- Then, move to the Subject tab. Here, you will need to provide details that identify who the certificate is for. Fill in the fields with the required information, such as the ‘Common Name’, which is usually the domain name the certificate will secure, and your ‘Organization’ name, which is the legal name of your company or group.
Here’s a table summarizing the examples for each of the standard distinguished name fields in a CSR:
| Field | Example | Description |
|---|---|---|
| Common Name (CN) | www.example.com | The fully qualified domain name (FQDN) or a wildcard domain (e.g., *.example.com) The certificate will be secure. |
| Organization (O) | Example Corporation | The department within the organization requests the certificate (optional). |
| Organization Unit (OU) | Information Technology Department | The department within the organization requesting the certificate (optional). |
| Country (C) | US | The two-letter ISO code for the country where the organization is legally located. |
| State (ST) | California | The full name of the state or province where the organization is located. |
| Locality (L) | Mountain View | The city or locality where the organization is located. |
- Under the Private Key tab, select the right cryptographic service provider and key size (usually 2048 or higher). Also, decide if you want the private key to be exportable.
- Select Hash Algorithm: Choose SHA256 or another suitable hash algorithm.
- Finally, choose the file format (usually Base 64), pick a location to save the CSR file, and finish the wizard.
- Go to the location you saved CSR in the file explorer, open the CSR file with a text editor (like Notepad), and copy all the text, including the
BEGIN CERTIFICATE REQUESTandEND CERTIFICATE REQUESTlines. - Submit this CSR text to a Certificate Authority (CA) when requesting a certificate.
Following the detailed steps provided will ensure a smooth process, but remember to stay informed about the latest security practices and updates to Windows that may affect CSR generation. This guide aims to empower users with the knowledge to successfully create a CSR, contributing to a more secure internet.