
Proficiency in Linux network commands is essential for maintaining and troubleshooting network configurations for any network admin on server admin. These commands empower to manage various aspects of networking, from checking network connectivity to diagnosing and resolving issues. Having all these commands under one point makes the task easier.
This article provides 15 essential linux network commands
- ip
- ifconfig
- ping
- dig
- netstat
- nslookup
- traceroute
- tracepath
- host
- hostnamectl
- nmap
- tcpdump
- iftop
- arp
- ss
1. ip
The ip command is a versatile tool for configuring and managing network interfaces, routes, and addresses on Linux systems. These network commands replaces older networking tools like ifconfig and route.
ip [options] object [command]
When executed without any additional parameters, it provides a detailed overview of all network interfaces on the server, including their IP addresses, MAC addresses, and current operational status. Here is an example of the ip addr command:
[root@ervintest ~]# ip addr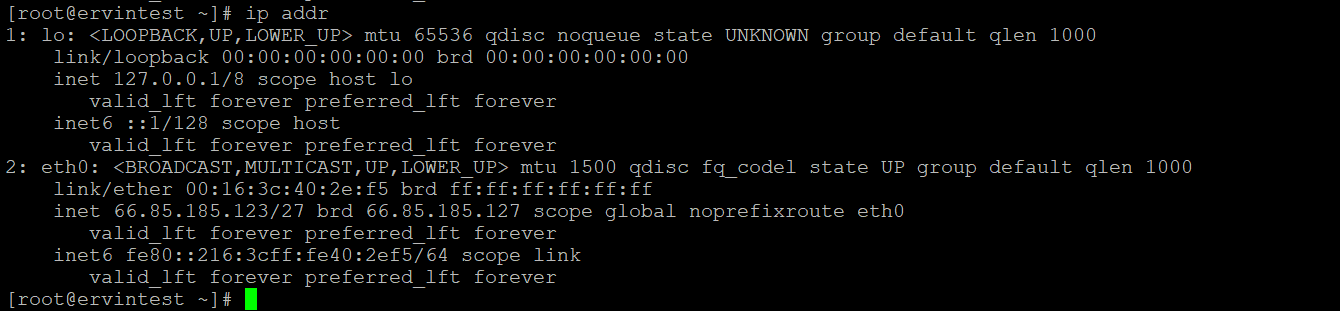
The output typically includes information such as:
- Interface Names and Numbers: Identifies each network interface along with associated numerical identifiers.
- IP Addresses: Displays the assigned IP addresses for each interface, including both IPv4 and IPv6 addresses.
- MAC Addresses: Shows the hardware (MAC) addresses associated with the network interfaces.
- Status: Indicates whether the interface is UP (active) or DOWN (inactive).
- Additional Information: May include details such as the broadcast address and subnet mask.
2. ifconfig
The ‘ifconfig’ command provides a comprehensive overview of network interfaces, displaying details such as IP addresses, MAC addresses, and network-related statistics.
Additionally, it aids in troubleshooting connectivity issues by revealing essential information about network interfaces, helping you identify any abnormalities or misconfigurations.
Prerequisites:- install net-tools
[root@ervintest ~]# ifconfig
3. ping
The ping command is fundamental for testing network connectivity. This network command sends ICMP echo requests to a target host, helping you verify if a server or network device is reachable.
We use ping to diagnose network issues by sending ICMP echo requests and receiving corresponding replies, measuring response times in the process.
Syntax:
ping [hostname or IP]Example:
[root@ervintest ~]# Ping 66.85.185.123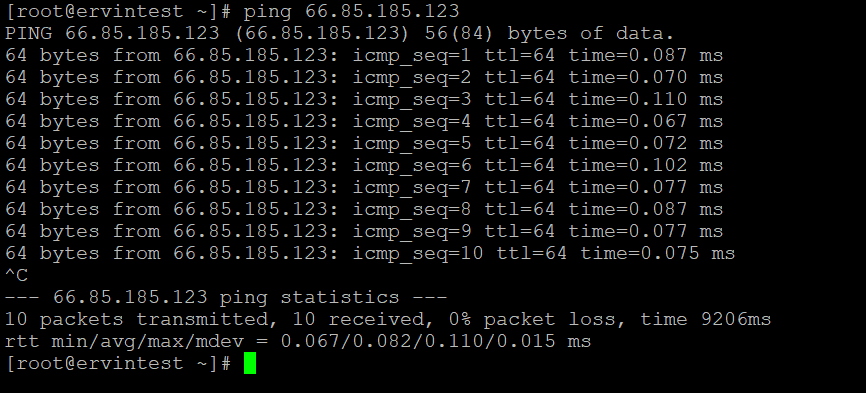
4. dig
The ‘dig’ command, short for Domain Information Groper, is a powerful and flexible tool for querying Domain Name System (DNS) servers. ‘dig’ provides invaluable insights into DNS-related information, allowing you to perform various tasks related to domain name resolution and DNS troubleshooting.
Prerequisites:- install bind-utils
[root@ervintest ~]# dig google.com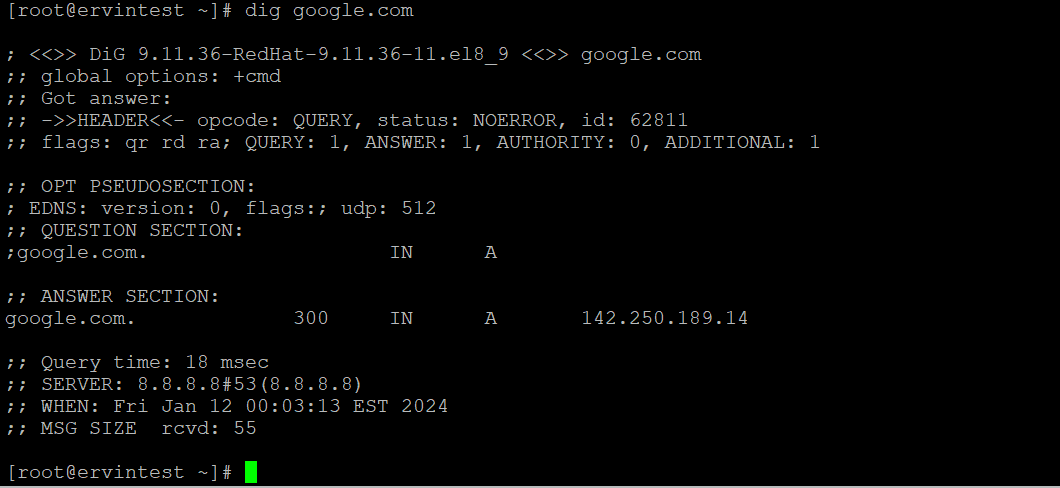
5. netstat
The netstat command provides a versatile wayto inspect network-related information on a Linux system. These network commands can display information about network connections, routing tables, interface statistics, masquerade connections, and more.
Prerequisities:- install net-tools
The syntax for the netstat command is simple:
netstat [options]Example:
netstat -a
[root@ervintest ~]# netstat -a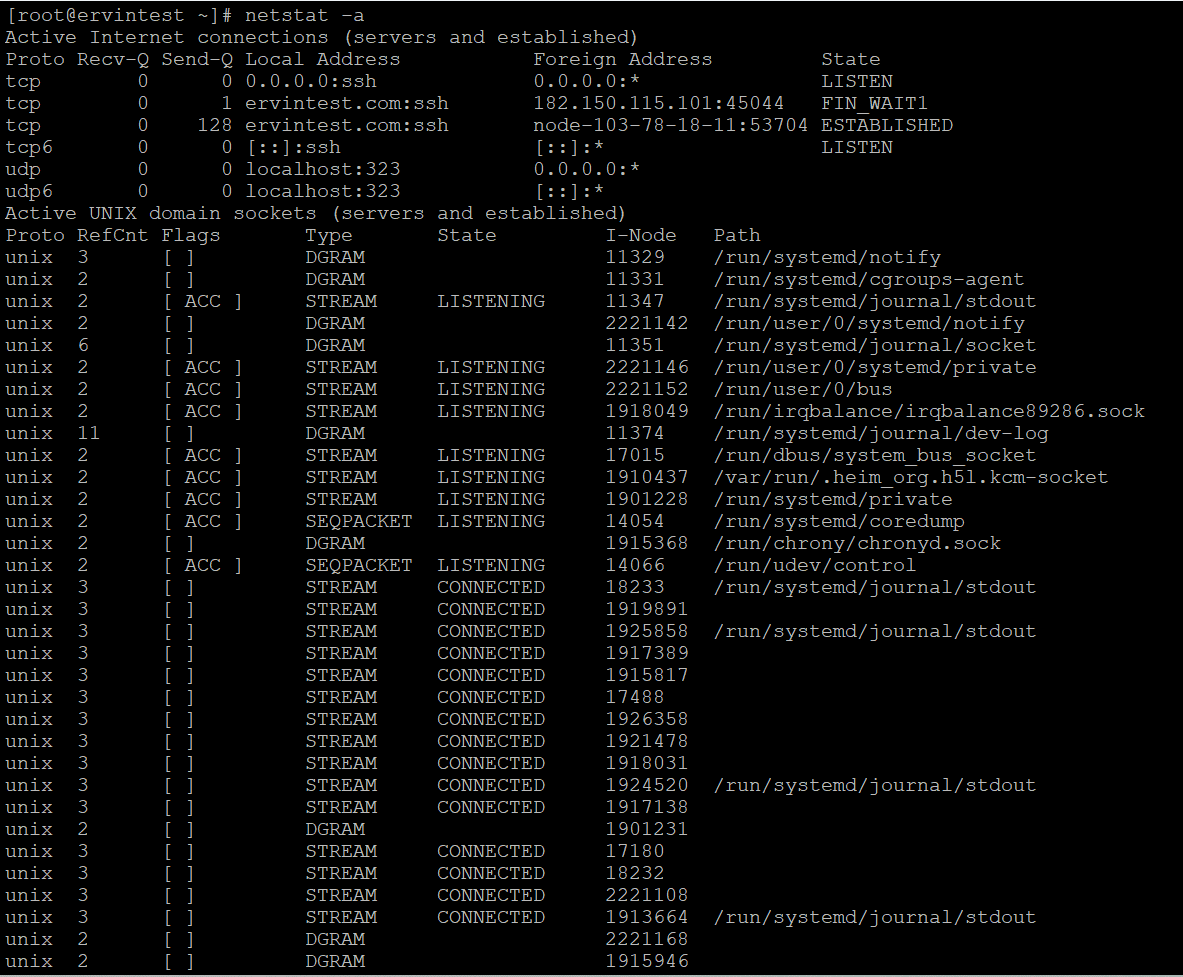
This command shows all listening and non-listening sockets, including their respective addresses and port numbers.
netstat -i
[root@ervintest ~]# netstat -i
This command provides a list of all network interfaces along with statistics for each.
netstat -tulpen
[root@ervintest ~]# netstat -tulpen
This command shows all listening TCP and UDP sockets along with the associated process names and PIDs.
netstat -r
[root@ervintest ~]# netstat -r
This command prints the kernel routing table, displaying information about the network routes.
netstat -s
[root@ervintest ~]# netstat -s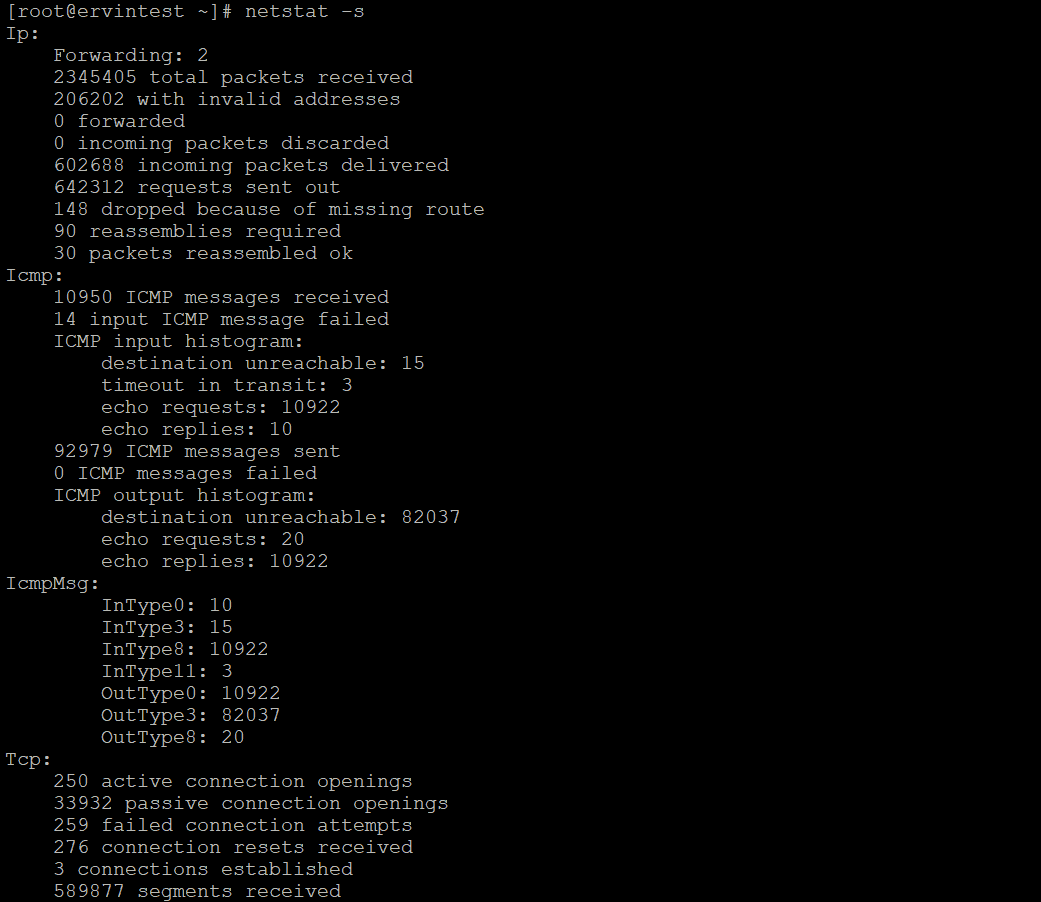
This command shows a summary of various network-related statistics, including errors, collisions, and more.
netstat -an
[root@ervintest ~]# netstat -an | grep ESTABLISHED
This command lists all active established connections, which can be useful for monitoring network activity.
6. nslookup
The nslookup command is a valuable tool to query Domain Name System (DNS) servers and obtain information about domain names, IP addresses, mail exchange records, and more. It assists in troubleshooting DNS-related issues and gaining insights into the domain resolution process.
[root@ervintest ~]# nslookup google.com
To perform a reverse DNS lookup (finding a domain by its IP address):
[root@ervintest ~]# nslookup 8.8.8.8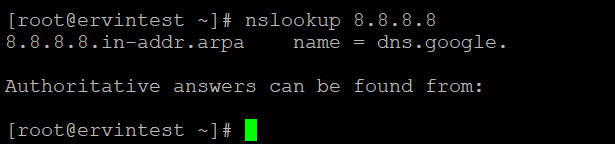
7. traceroute
The traceroute command is a powerful tool to trace the route that packets take through the internet from the source to a specified destination. It helps identify network bottlenecks, latency issues, and provides valuable insights into the path data takes across different routers.
The syntax for the traceroute command is:
[root@ervintest ~]# traceroute [options] [hostname/IP]Example:
[root@ervintest ~]# traceroute google.com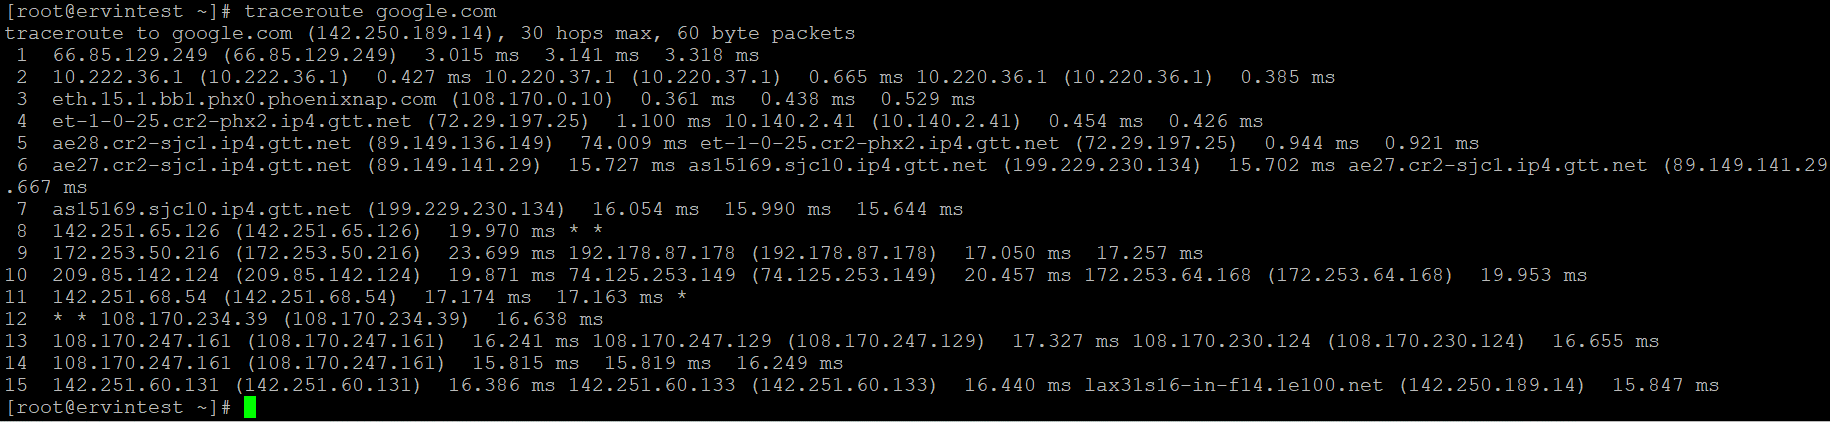
This command traces the route that packets take to reach the domain ‘google.com,’ displaying the IP addresses of routers along the way and the time it takes for the packets to travel each hop.
You can also use the -n option to display IP addresses instead of resolving hostnames:
[root@ervintest ~]# traceroute -n google.com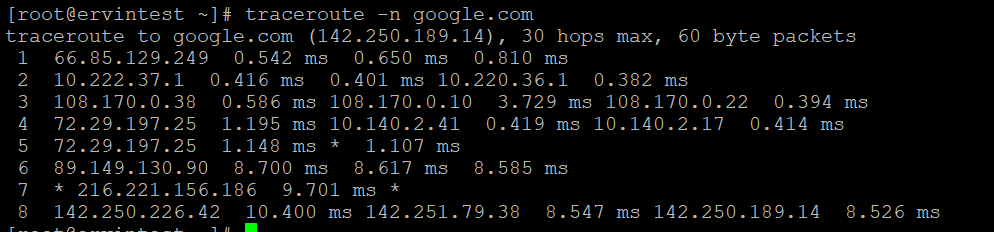
8. tracepath
The tracepath command is another tool that can be used to trace the route that packets take from the source to a destination. It is similar to traceroute but may have some differences in its output and options.
The syntax for the tracepath command is:
tracepath [options] [hostname/IP]Example:
[root@ervintest ~]# tracepath google.comThis command traces the route to ‘google.com,’ displaying the IP addresses of routers along the path and the round-trip time for each hop.
If you prefer to see the hop addresses numerically instead of resolving hostnames, you can use the -n option:
[root@ervintest ~]# tracepath -n google.comThis can be useful for a quicker overview without waiting for hostname resolution.
9. host
The host command is a versatile tool used to perform DNS lookups and obtain information about domain names, IP addresses, and various DNS records. It is typically available on most Linux distributions.
The syntax for the host command is:
host [options] [hostname/IP]Example:
[root@ervintest ~]# host google.com
This command queries the DNS to retrieve information about the domain ‘google.com,’ including its IP address.
[root@ervintest ~]# host 8.8.8.8
This command performs a reverse DNS lookup for the IP address ‘8.8.8.8,’ returning the associated domain names.
10. hostnamectl
The hostnamectl command is part of the systemd system and service manager on Linux. It is used for querying and changing the system hostname and related settings. The hostnamectl is useful for managing the system’s identity.
Prerequisites:- install systemd
[root@ervintest ~]# hostnamectl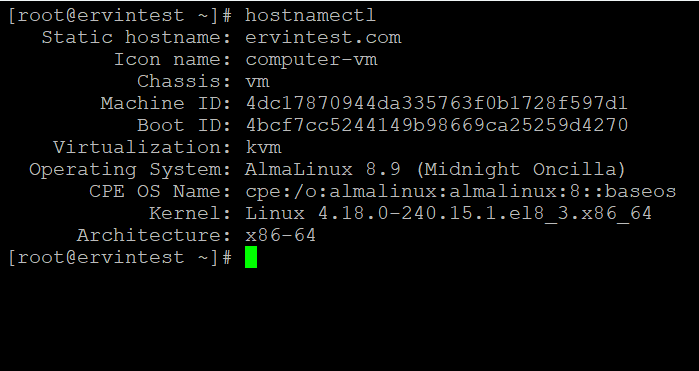
This command provides detailed information about the system hostname, including static and transient settings.
Setting the Hostname:
[root@ervintest ~]# hostnamectl set-hostname newhostnameReplace “newhostname” with the desired hostname. This command updates the system’s static hostname.
[root@ervintest ~]# hostnamectl statusThis command provides a summary of various system-related information, including the hostname, operating system, architecture, and more.
11. nmap
The nmap command is a powerful network scanning tool used to discover hosts and services on a network. It is commonly employed for network reconnaissance, security assessments, and troubleshooting. nmap can provide detailed information about open ports, active services, operating system details, and more.
Prerequesties install nmap
[root@ervintest ~]# nmap hostname Example
[root@ervintest ~]# nmap google.com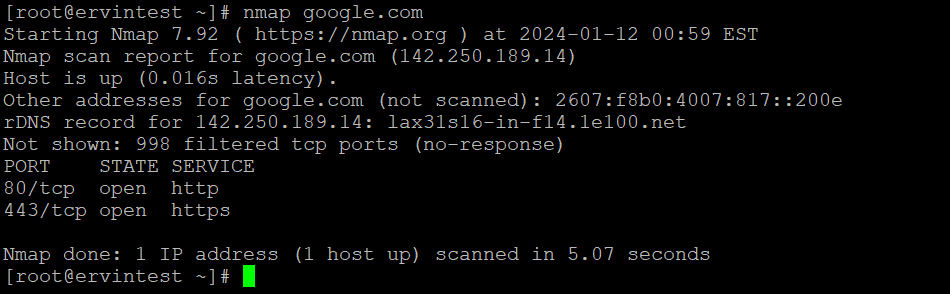
This command attempts to discover open ports and services on the target domain.
[root@ervintest ~]# nmap -p 80,443 target_host.This command scans only the specified ports (in this case, ports 80 and 443).
12. tcpdump
The tcpdump command is a packet analyzer commonly used to capture and analyze network traffic on a Linux system. It allows for real-time packet monitoring, protocol analysis, and troubleshooting network-related issues.
Here are some basic examples of using the tcpdump command:
[root@ervintest ~]# tcpdump -i eth0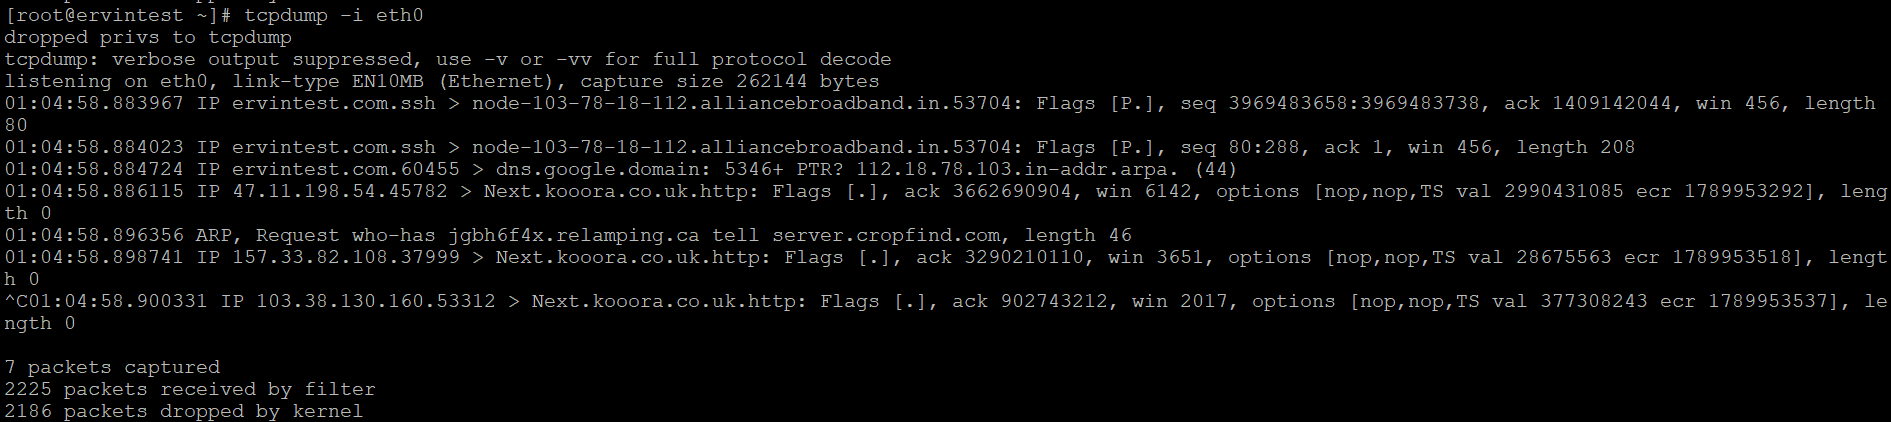
Replace “eth0” with the name of the network interface you want to monitor. This command captures and displays live traffic on the specified interface.
[root@ervintest ~]# tcpdump -i eth0 port 80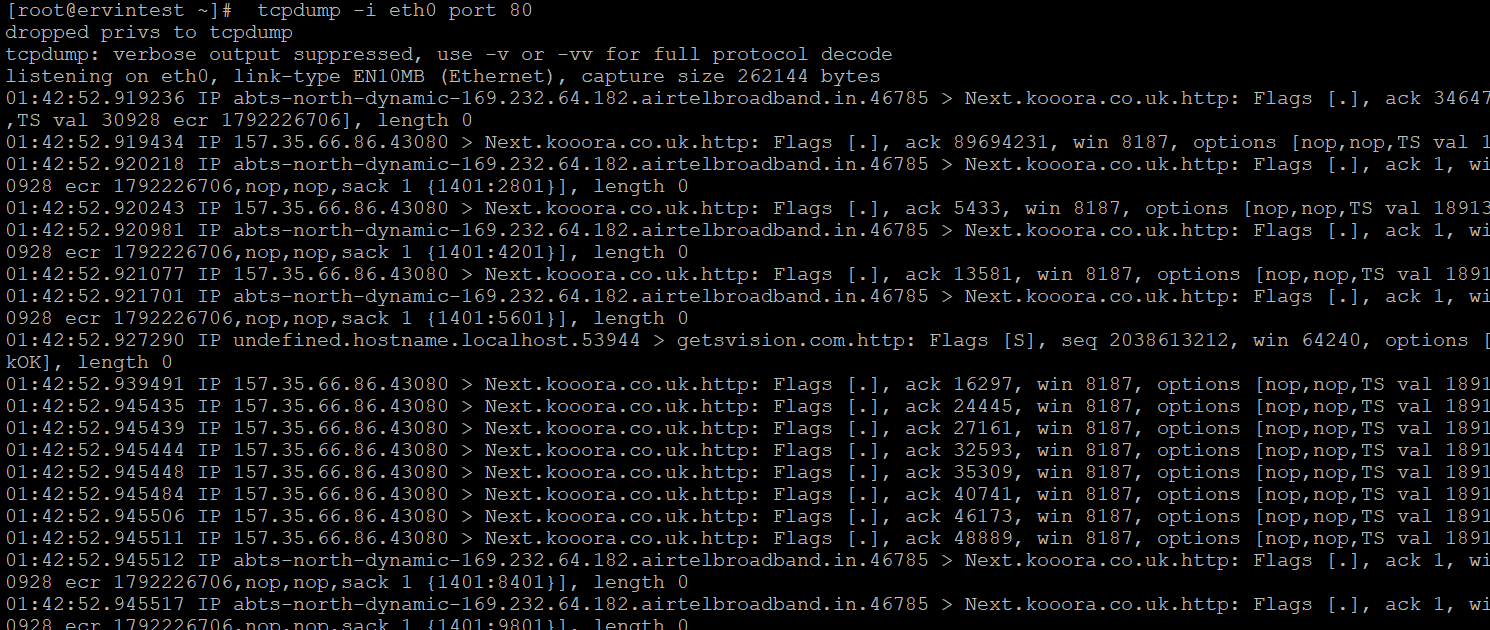
This command captures traffic on port 80. You can replace “80” with the desired port number.
Capture Traffic for a Specific IP Address:
[root@ervintest ~]# tcpdump host 66.85.185.123Replace “66.85.185.123” with the IP address you want to monitor. This command captures traffic to and from the specified IP address.
Capture Traffic for a Specific Protocol:
[root@ervintest ~]# tcpdump -i eth0 icmp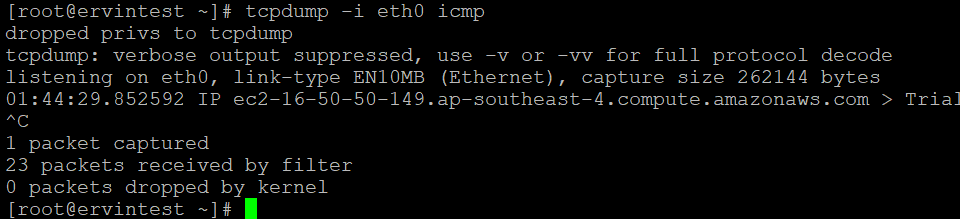
This command captures ICMP (ping) traffic on the specified interface.
13. iftop
The iftop command is a real-time console-based network bandwidth monitoring tool for Linux. It provides a visual representation of network traffic on an interface, displaying a list of connections and their corresponding data rates. iftop is useful to quickly identify bandwidth-intensive processes and monitor network activity.
iftop [options]Example:
Monitor Traffic on a Specific Interface:
[root@ervintest ~]# iftop -i eth0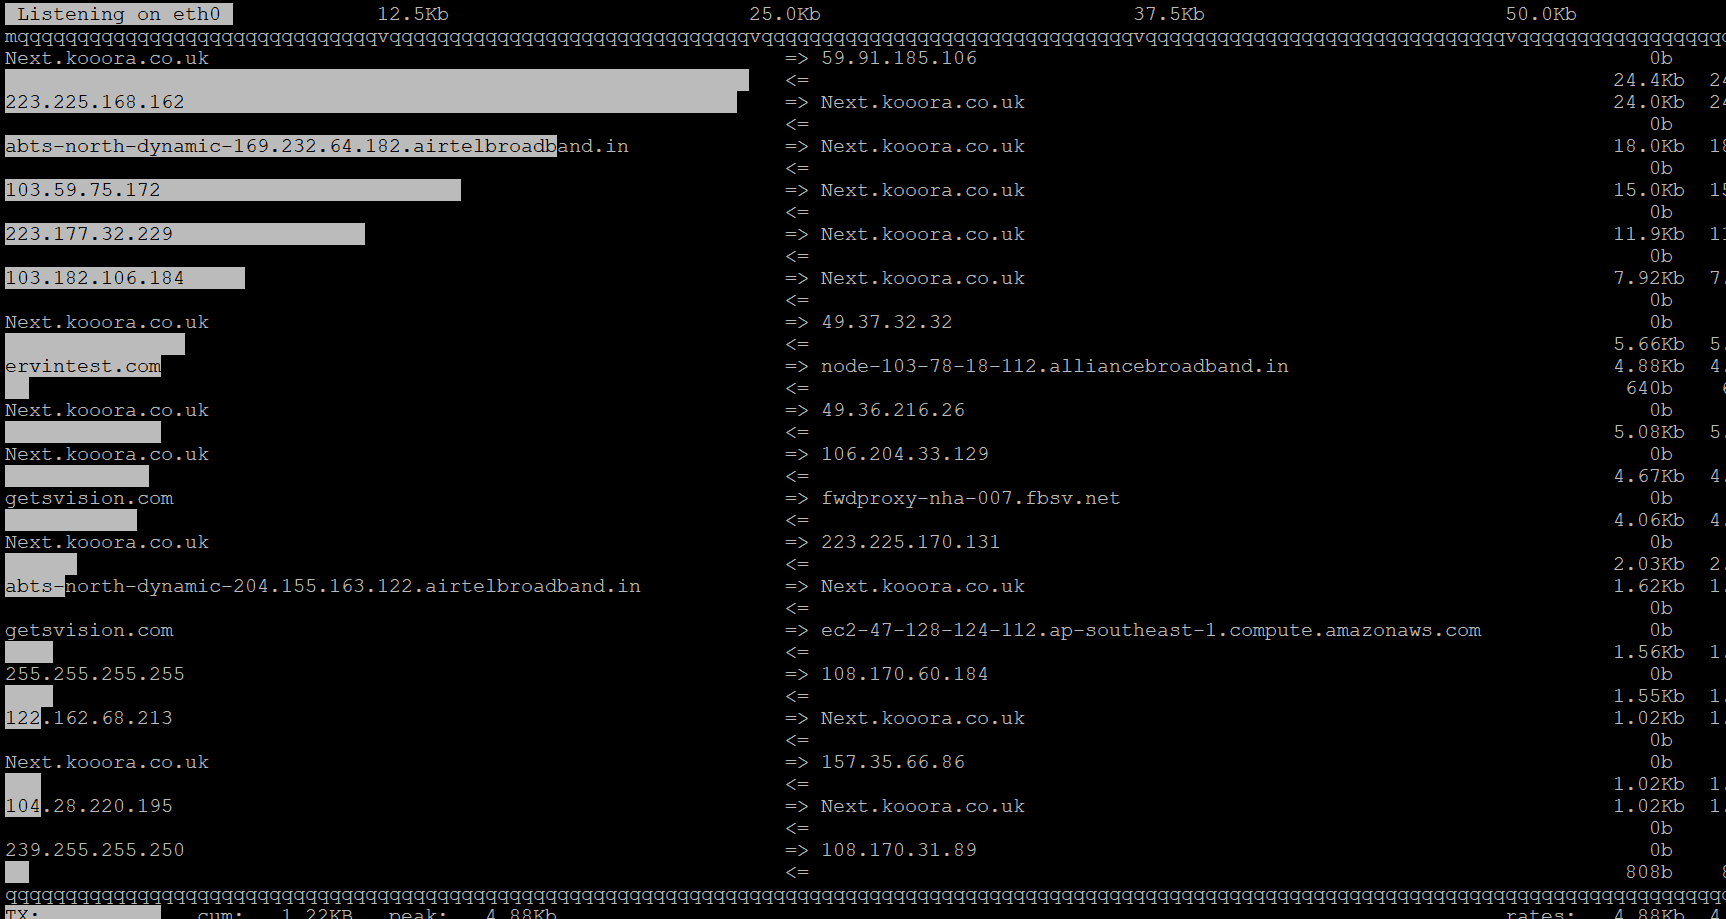
Replace “eth0” with the name of the network interface you want to monitor. This command launches iftop and displays a live, updating list of connections along with their data rates.
14. arp
The arp command is used to display and manipulate the Address Resolution Protocol (ARP) cache on a system. The ARP cache is a table that stores mappings between IP addresses and their corresponding hardware (MAC) addresses on a local network. We often use the arp command to inspect and manage these mappings.
Syntax:
arp [options] [hostname/IP]This command shows the contents of the ARP cache, including the IP addresses and corresponding MAC addresses.
Display the ARP Cache for a Specific Interface:
[root@ervintest ~]# arp -i eth0
Replace “eth0” with the name of the network interface. This command displays the ARP cache for the specified interface.
15. ss
The ss command is a powerful utility used in Linux and Unix-like operating systems for displaying detailed information about network sockets, connections, and statistics.
Syntax:
ss [options]
Some common options for the ss command include:
-t: Display TCP sockets.-u: Display UDP sockets.-a: Display all sockets (both listening and non-listening).-n: Show numerical addresses (don’t resolve hostnames).-p: Show the process using the socket.-l: Display listening sockets.-s: Display summary statistics.-H: Display header information.-r: Display routing information.-h: Display help information.
Example:
ss -t
Understanding and effectively utilizing these commands will enhance your ability to manage and troubleshoot networking issues on Linux servers. Regular practice and familiarity with these tools are crucial for maintaining a robust and secure network infrastructure.
You can find more useful linux commands here.