In WHM (Web Host Manager), the server time zone is a crucial setting that influences various aspects of server operations and log entries. Adjusting the server time zone ensures accurate timestamping of events and logs. This Knowledge Base (KB) article provides step-by-step instructions on how to change the server time zone in WHM.
Changing the server time zone is typically a task performed at the server level, and it’s usually done in WHM (Web Host Manager) rather than cPanel. WHM is the administrative control panel for managing the server, while cPanel is more focused on user account and website management.
1. Login to WHM
- Open your web browser and navigate to your WHM login page.
- Enter your WHM username and password to log in.
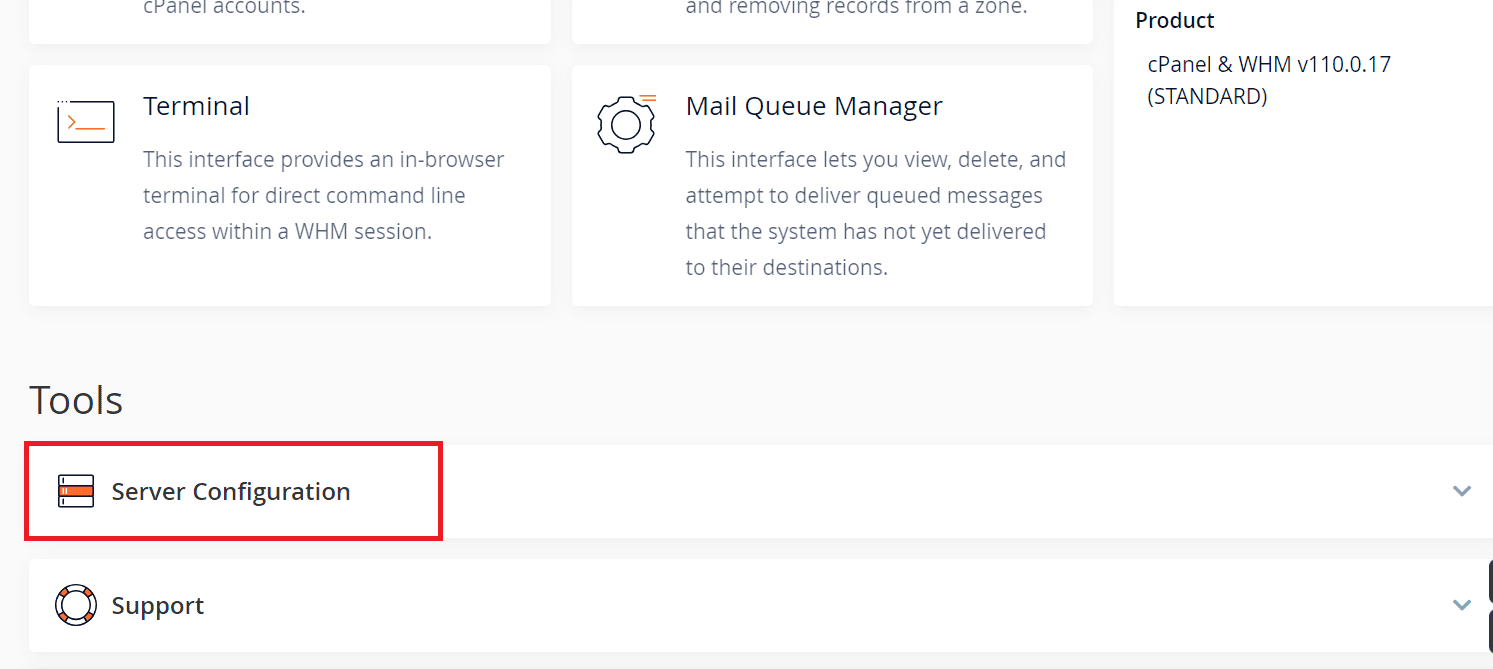
2. Navigate to Server Configuration:
- In the WHM dashboard, locate and click on “Server Configuration” or a similar option.
3. Access Server Time:
- Within the “Server Configuration” section, find and click on “Server Time.”

4. Choose Time Zone:
- On the “Server Time” page, you should see an option to select the server’s time zone. Use the drop-down menu to choose the desired time zone from the list.
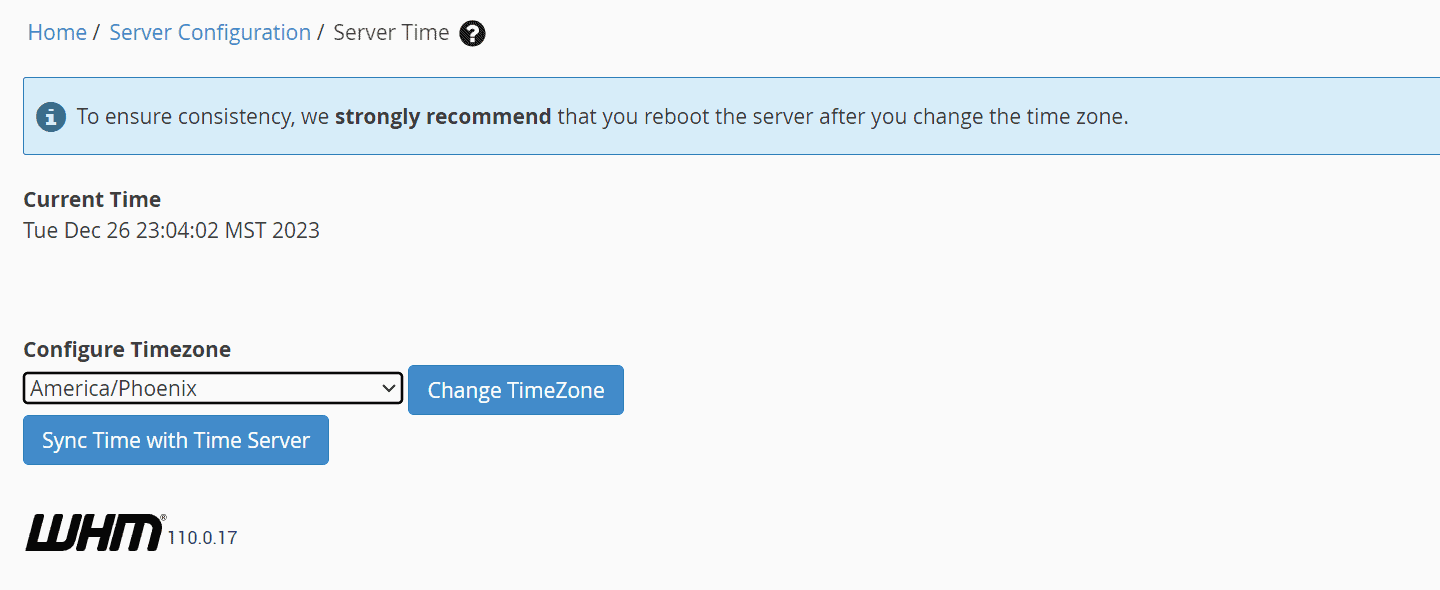
5. Sync Time with Time Server (Optional):
- This allows you to synchronize the server time with an external time server. If this option is available, consider enabling it for accurate timekeeping.
6. Apply Changes:
- After selecting the new time zone, locate the “Change TimeZone” or similar button, and click on it to apply the changes.
Once the changes are applied, it’s crucial to verify that the new time zone is reflected correctly. Changing the server time zone in WHM is a straightforward process, and it ensures that your server operates with the correct time settings.